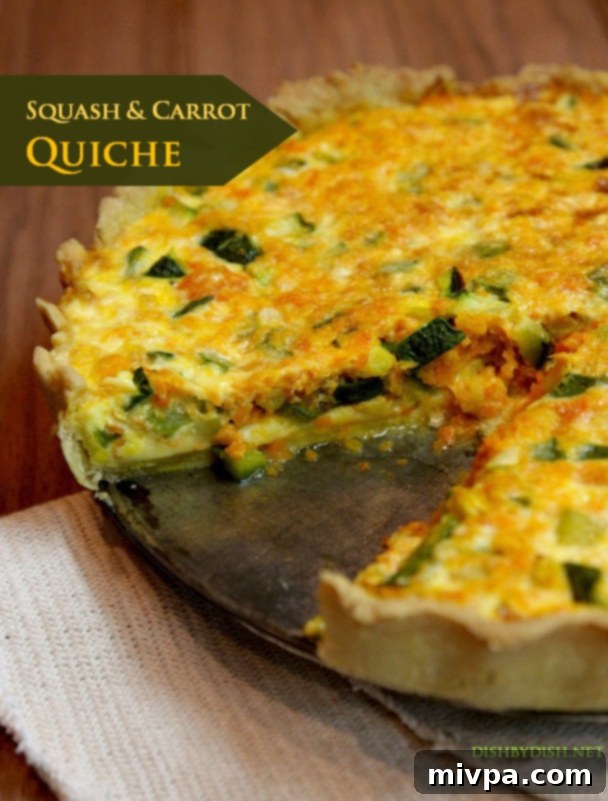
Mastering Homemade Quiche: A Culinary Journey from Cooking Class to a Delicious Squash & Carrot Recipe
Every Thursday evening, as the clock approaches 7 PM, a remarkable transformation begins. The weariness of a long day at the office dissipates, replaced by an invigorating surge of excitement. This is the moment I step into my cooking class, a place where culinary passion is not just nurtured, but consistently reignited. Surrounded by a group of fellow enthusiasts, I eagerly take my seat, ready to absorb every invaluable lesson our incredible professor, Pelusa Molina, imparts.
My eyes are invariably drawn to the display table, a tableau of culinary anticipation. Here, every ingredient, meticulously pre-measured and arranged in pristine bowls and plates, awaits its transformation – a perfect example of mise en place. The air itself is a symphony of scents: the sweet promise of baking cakes mingling with the pungent, comforting aroma of freshly chopped garlic and onions sizzling in a pan. It was in this vibrant, sensory-rich environment that my profound love for cooking first truly blossomed, and it continues to grow with each passing week.
The Heart of My Culinary Journey: A Weekly Cooking Class
Each session is an adventure. With a quick glance at the menu for the evening, I almost always discover something entirely new – a dish I’ve never prepared, perhaps never even tasted. This constant novelty, coupled with the certainty of invaluable takeaways and ingenious insights from Pelusa, is what fuels my excitement. She possesses a treasure trove of kitchen wisdom, accumulated over decades of dedicated cooking and inspiring countless students. Every class feels like uncovering a hidden gem, a practical tip that simplifies complex tasks and elevates home cooking.
Pelusa shares secrets that seem almost magical in their simplicity and effectiveness. Who knew, for instance, that the easiest way to peel ginger is not with a knife, but with a small teaspoon, gently scraping away the skin? Or that fresh herbs can be kept vibrant and fragrant for up to two weeks by simply placing them in a small cup of water in the refrigerator, much like a bouquet of flowers? A revelation for any baker, she taught us that soaking raw almonds in hot water for a few minutes makes their skins slip right off, saving considerable time and effort. But perhaps the most surprising and undeniably “cool” tip so far, in my humble opinion, is how to effortlessly banish the stubborn smell of garlic from your hands: simply rub them against a stainless steel bowl or spoon under cold running water. It’s these small, yet impactful, pieces of knowledge that make every class an indispensable learning experience.
Whether I’m one of the eager volunteers actively engaged in the cooking process – chopping endless stalks of spring onions with rhythmic precision or rapidly dicing tomatoes – or contentedly observing from my seat, wide-eyed as others work their magic, I am utterly engrossed. For someone like myself, who recognizes the vast culinary landscape still to explore, a live cooking class is an unparalleled source of fascination. It transcends watching a celebrity chef on high-definition television; here, the experience is immersive. You don’t just see; you smell the delicious aromas wafting from the pans, feel the warmth emanating from the oven, and, best of all, you participate in the grand finale – our delightful degustation menu, tasting the fruits of our labor. The sensation of constant discovery and learning is truly amazing, a feeling I wish everyone could experience.
Mastering the Foundation: Crafting the Perfect Tart Shell
Among the many profound lessons from Pelusa’s class, one of the most memorable and transformative was the first time I witnessed her create a tart shell entirely from scratch. While I may have briefly touched upon this experience when I previously made Quiche Lorraine, the entire process was so captivating and fundamental to pastry making that I simply must delve into it again. It demystified a cornerstone of baking, proving that with the right technique, even a seemingly daunting task becomes approachable.
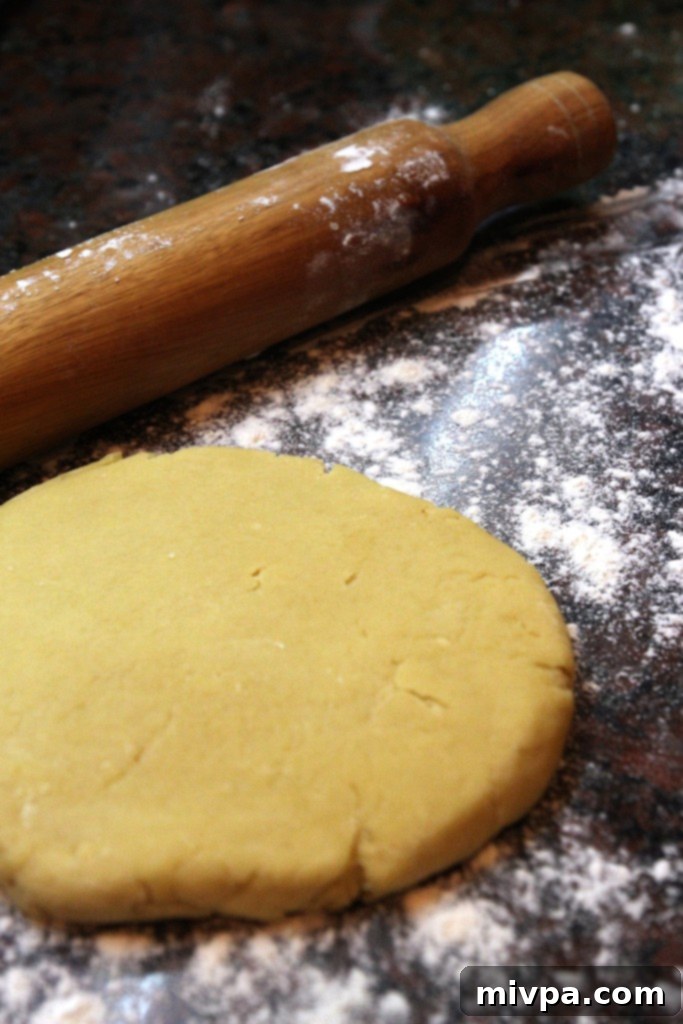
With quick, practiced, and remarkably efficient movements, Pelusa combined flour, cold cubed butter, egg yolks, a pinch of salt, and a careful measure of water. She worked them together just until they coalesced into a cohesive dough. The key, she emphasized, was minimal kneading – just enough to bring the ingredients together without developing too much gluten, which would result in a tough crust. Once formed, she gently shaped the dough into a small disc, wrapped it snugly in plastic film, and allowed it to chill in the refrigerator for approximately thirty minutes. This resting period is crucial, allowing the gluten to relax and the butter to firm up, making the dough much easier to roll.
The Art of Rolling: Transforming Dough into a Delicate Shell
The moment the dough emerged, perfectly chilled and rested, was when the real artistry began – the delicate yet determined act of rolling it thinly into a perfect tart shell. While not inherently difficult, this stage demands a certain degree of strength, patience, and as Pelusa so aptly puts it, “con ganas” – a Spanish phrase meaning “with desire” or “with eagerness.” It’s a reminder that intention and passion are as crucial in the kitchen as precise measurements.
Before the rolling pin even touched the dough, Pelusa demonstrated a vital preparatory step. She took a generous handful of flour, sprinkling it liberally across her clean, cool work surface until it resembled a delicate dusting of fresh snow. Next, she placed the chilled dough disc onto this floured expanse and lightly dusted her wooden rolling pin with more flour. Then, with a gentle, patting motion, she “relaxed” the dough – a technique designed to make it more pliable and less resistant to rolling. This wasn’t about flattening, but about coaxing the dough into readiness.
Once relaxed, she began the rolling process, first vertically, then horizontally, gradually expanding the disc into a larger, more even circle. Only after achieving this foundational shape did she truly begin rolling outwards in a full 360-degree motion, maintaining an even thickness. Throughout this precise dance, she would periodically lift the dough using a large, flat metal spatula, ensuring it never adhered to the floured surface. This meticulous attention to detail prevents sticking and tearing, guaranteeing a beautifully smooth and intact shell.
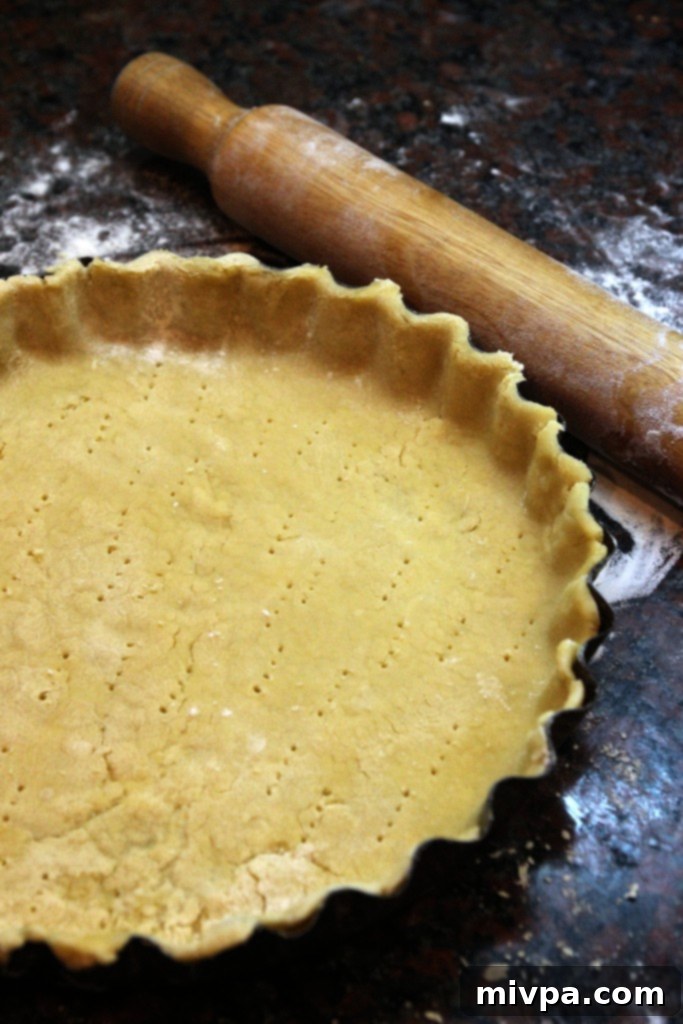
Eventually, when the dough reached a circumference slightly larger than the base and sides of the tart mold, she masterfully draped it over the rolling pin and, in a fluid motion, transferred it into the greased tart mold. This entire operation unfolded in a matter of seconds, a testament to her experience. The specific dough Pelusa uses is remarkably robust, resisting breakage unlike other, more delicate varieties I’ve encountered. This resilience is a huge advantage for home bakers, and I highly recommend seeking out similar recipes. Once the tart shell was perfectly fitted into the mold, she used a fork to prick numerous holes across its surface – a crucial step to prevent the dough from puffing up unevenly during baking. A brief ten-minute pre-bake in the oven solidified its structure before it was ready to receive its delicious filling.
From Classroom to Kitchen: Baking My Own Squash & Carrot Quiche
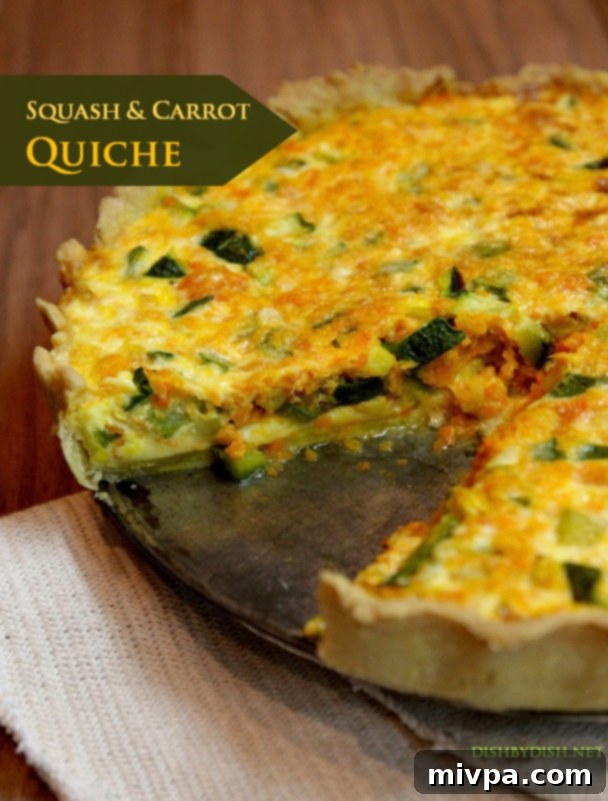
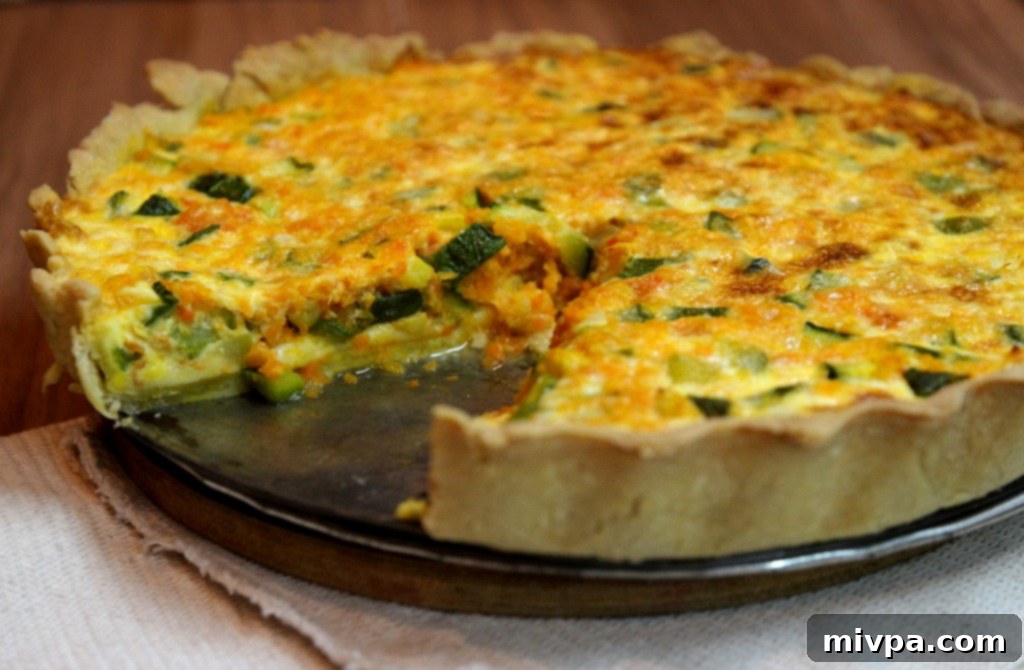
Inspired by Pelusa’s elegant demonstration and my newfound confidence, I began to practice making my own tart shells at home whenever the opportunity arose. It’s a therapeutic and rewarding process, seeing simple ingredients transform into the foundation of a delicious meal. This particular time, my efforts culminated in a delightful squash and carrot quiche, born from a craving for something simultaneously hearty, flavorful, and wonderfully light.
A Little Food Note: Understanding the Versatility of Quiche
For those new to the world of savory tarts, a quiche is essentially a classic French open-faced pastry tart. Its signature characteristic lies in its rich, creamy filling, which invariably includes a luscious mixture of cream and eggs. While the most globally celebrated variant is arguably the Quiche Lorraine, known for its bacon and Gruyère cheese, the beauty of quiche lies in its incredible adaptability. By simply swapping out the “other” ingredients in the filling – be it vegetables, different cheeses, or various meats – while retaining the fundamental cream and egg base, you can explore an endless variety of flavors and textures, making it a perfect canvas for culinary creativity.
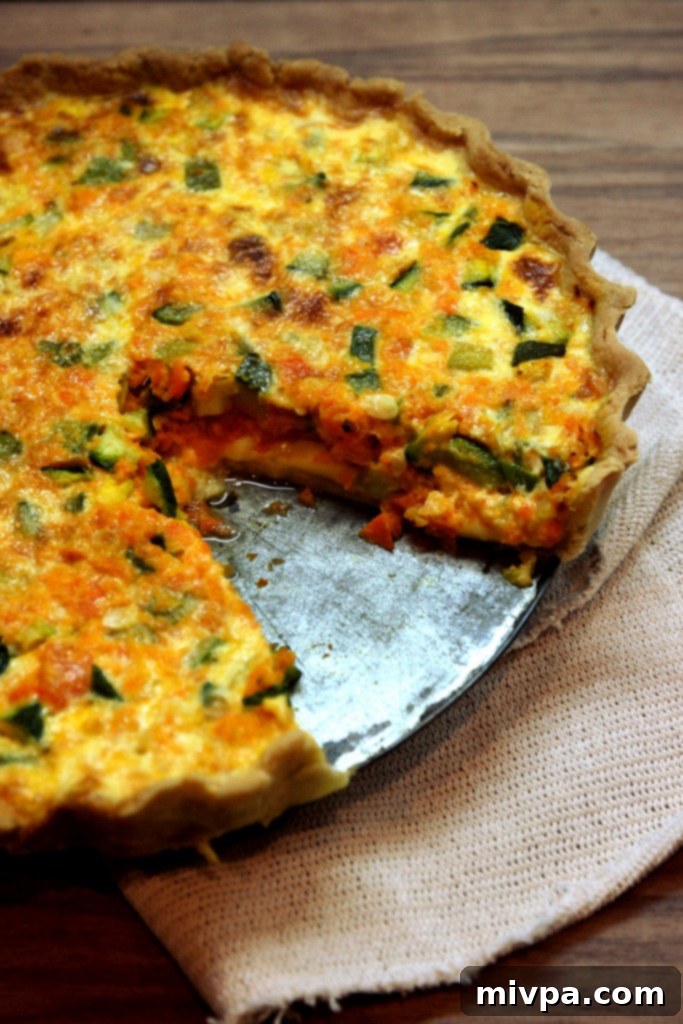
Imagine, if you will, the vibrant spectacle of finely shredded orange carrots and tender, diced green squash, gently sautéed until perfectly tender. These colorful vegetables are then lovingly folded into a silky smooth mixture of beaten eggs and a touch of rich cream, seasoned simply yet perfectly with a confident shake of salt and freshly ground pepper. Envision this deliciously nutritious medley, packed generously over a layer of savory cheese slices nestled within a golden, pre-baked tart shell. This entire creation is then carefully returned to the warmth of the oven, where it bakes until the egg mixture achieves a beautiful, golden coagulation. The moment the center is set and no longer wobbly, you know it’s time to retrieve your masterpiece.
The Irresistible Allure of a Freshly Baked Quiche
The anticipation builds even before the first slice is cut. Rich, fresh aromas, a harmonious blend of vegetables, cheese, and buttery crust, tempt you with their fragrant embrace. As you finally cut into the quiche, the delicate, golden-brown crust reveals itself, promising an unparalleled experience. Its subtle buttery flavor and homemade texture offer a depth and character that no store-bought shell could ever hope to replicate – it truly is a game-changer. And then, there’s the filling: a creamy, tender, and deeply satisfying medley that leaves you feeling utterly content and wonderfully nourished. This squash and carrot quiche is not just a meal; it’s a testament to the joy of cooking from scratch, a delicious echo of lessons learned and passions ignited.
SQUASH & CARROT QUICHE (Serves 4)
Inspired by Pelusa Molina
Ingredients:
For the tart shell:
- 200g of all-purpose flour
- 100g of cold butter, cubed
- 100g of cold water
- 1 egg yolk
- A pinch of salt
For the filling:
- 2 small green squashes, diced (about 2 cups)
- 2 carrots, peeled and shredded (about 1 cup)
- 3 large egg yolks
- 1 whole large egg
- 200g of heavy cream
- 150g of Gruyère cheese (or a similar firm, savory cheese like Emmental), cut into small strips or grated
- Salt & freshly ground black pepper to taste
Steps:
- Prepare the Tart Shell Dough: In a large bowl, combine the flour and salt. Add the cold, cubed butter and cut it into the flour using your fingertips, a pastry blender, or a food processor until the mixture resembles coarse crumbs with some pea-sized pieces of butter remaining. In a separate small bowl, whisk the egg yolk with a little bit of the cold water. Gradually add the egg yolk mixture and then the remaining cold water, a tablespoon at a time, to the flour-butter mixture. Mix until the ingredients just come together to form a dough that is neither too dry nor overly sticky. (If too sticky, add a tiny bit more flour; if too dry, add a few drops more water). Avoid overmixing.
- Chill the Dough: Gently form the dough into a small, flattened disc. Wrap it tightly in plastic wrap and let it chill in the refrigerator for at least 30 minutes. This allows the gluten to relax and the butter to firm up, making the dough easier to roll.
- Prepare Vegetables: While the dough is chilling, dice the green squashes. Peel and shred the carrots. This can be done quickly with a food processor’s shredding attachment or manually with a grater.
- Sauté Vegetables: Heat a small amount of oil in a pan over medium heat. Add the diced squash and shredded carrots and sauté for just 3-4 minutes, until they are slightly tender but still have a bit of crispness. Set aside to cool slightly.
- Pre-heat Oven: Preheat your oven to 180°C (350°F).
- Roll Out Dough: Once the dough has chilled, remove it from the refrigerator. Generously sprinkle a clean, flat, and cool work surface with flour. Place the dough disc on the floured surface.
- Form the Shell: Dust your wooden rolling pin with flour. Gently pat down the dough with the rolling pin to “relax” it. Roll the dough vertically and horizontally to expand the circle, then continue rolling outwards in a 360-degree motion until it is large enough to cover both the base and the height of your tart mold (typically 9-10 inches in diameter). Occasionally lift the dough with a large spatula to ensure it doesn’t stick to the surface.
- Prepare Tart Mold: Lightly grease your tart mold with either butter or cooking oil.
- Transfer Dough: Carefully drape the rolled dough over your rolling pin and gently transfer it into the prepared tart mold. Press the dough gently into the contours of the mold, trimming any excess from the edges. Use a fork to poke numerous holes across the bottom of the tart shell – this is crucial to prevent the dough from puffing up during baking.
- Pre-bake Tart Shell: Place the tart shell in the preheated oven and pre-cook it for about 10 minutes, or until lightly golden. This helps to create a crisp crust.
- Prepare Filling: While the tart shell is pre-cooking, combine the sautéed carrots and squash in a bowl. In a separate bowl, whisk together the 3 egg yolks, 1 whole egg, and heavy cream. Season generously with salt and freshly ground black pepper to taste. Pour this egg mixture over the vegetables and stir to combine well.
- Assemble Quiche: Once the tart shell has been pre-baked, remove it from the oven. Arrange the strips or grated Gruyère cheese evenly over the bottom of the pre-cooked shell. This layer of cheese acts as a barrier and adds flavor.
- Add Filling: Carefully pour the vegetable and egg filling over the cheese, gently pressing it down to ensure it’s evenly distributed and packed tightly.
- Bake Quiche: Return the quiche to the oven and bake for approximately 30 to 40 minutes. The quiche is ready when the filling has coagulated and set (it should not jiggle excessively in the center when gently shaken), and the tart shell edges are golden brown.
- Cool and Serve: Allow the quiche to cool on a wire rack for at least 10-15 minutes before slicing and serving. This allows the filling to fully set. Serve warm, perhaps with a fresh side salad for a perfect meal.
