Hearty & Easy Stovetop Dutch Oven Chili Con Carne (Gluten-Free & Dairy-Free)
Gather your loved ones around for a warm, comforting bowl of homemade chili! This easy stovetop Dutch oven chili con carne is a wholesome and incredibly satisfying meal, perfect for feeding a crowd or enjoying on a chilly evening. Simple to prepare, bursting with rich flavors, and ready in under an hour, this hearty beef chili recipe is your go-to for a delicious weeknight dinner or a cozy weekend feast. Best of all, it’s completely gluten-free and dairy-free, making it accessible for many dietary needs without compromising on taste.

Embrace Comfort with a Bowl of Classic Chili Con Carne
Few dishes evoke a sense of homey comfort quite like a generous bowl of chili con carne. Its rich, savory aroma fills the kitchen, promising warmth and satisfaction with every spoonful. This classic American dish, deeply rooted in Tex-Mex culinary traditions, is a beloved staple for good reason.
Chili con carne, literally meaning “chili with meat,” is a robust and flavorful stew typically made with minced or ground beef, tender tomatoes, and hearty beans, all simmered in a complex blend of chili powder, garlic, cumin, coriander, and other aromatic spices. It’s the ultimate culinary hug you need to chase away the chill on a cold winter night, or simply to enjoy a satisfying meal any time of year.
Today, we’re simplifying this beloved recipe by cooking it entirely in a Dutch oven on your stovetop. This one-pot method not only means minimal cleanup but also results in a deeply flavorful chili that’s ready to go from your burner to the table in just about 50 minutes. Get ready for an explosion of taste that will become a regular in your meal rotation!

Why This Easy Dutch Oven Chili Recipe Stands Out
There are countless chili recipes out there, but this Dutch oven chili con carne distinguishes itself with several key advantages:
- Effortlessly Simple Ingredients: You won’t need to hunt for exotic spices or specialty items. All the ingredients required for this Dutch oven chili recipe are readily available at any local grocery store. We focus on common pantry staples to bring you maximum flavor with minimal fuss, ensuring you can whip up this dish whenever the craving strikes.
- Quick and Easy Preparation: Don’t let the rich flavor fool you – preparing this chili con carne is surprisingly straightforward and incredibly fast! A delicious batch is ready in under an hour, making it an ideal choice for busy weeknights when you need a cozy and hearty dinner recipe without spending hours in the kitchen. It’s perfect for those colder seasons when you want something warm and filling on the table fast.
- Naturally Gluten-Free and Dairy-Free: We understand the importance of catering to various dietary needs. This chili recipe is proudly 100% gluten-free and dairy-free. This means that individuals with Celiac disease, gluten sensitivities, or lactose intolerances can wholeheartedly enjoy this savory meal without any concerns or compromises. It’s a delicious, inclusive recipe everyone can love!
- One-Pot Wonder: Cooking everything in a single Dutch oven means less washing up after your meal. This recipe is designed for maximum flavor and minimal mess, making your cooking experience as enjoyable as eating the chili itself.

Essential Ingredients for Your Dutch Oven Chili
To create this magnificent Dutch oven chili, you’ll need a selection of fresh and pantry-friendly ingredients. Each component plays a vital role in building the layers of flavor that make this chili so irresistible. Below is a visual overview to help you get started.
(For the precise measurements and quantities of each ingredient, please make sure to scroll down to the comprehensive printable recipe card located at the very bottom of this post.)
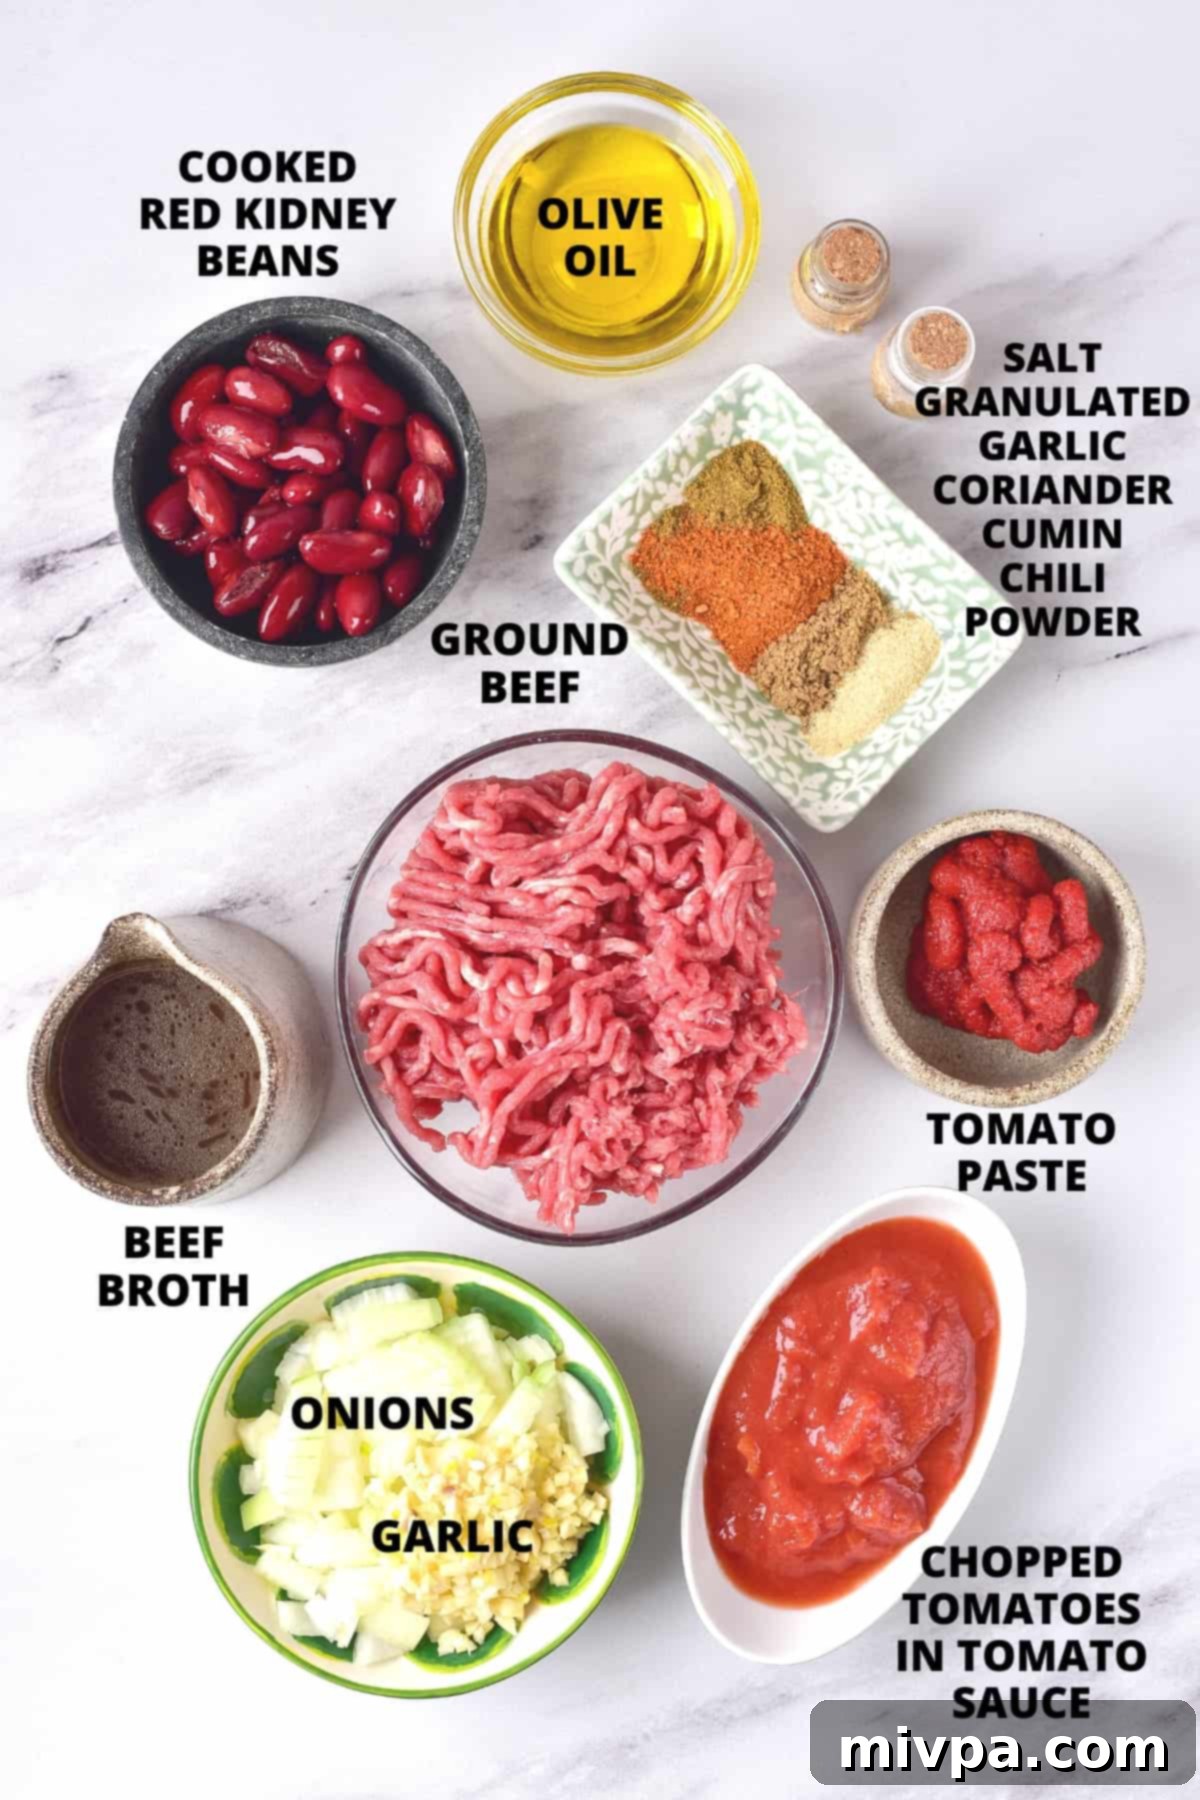
Recipe Notes & Easy Substitutions to Customize Your Chili
This recipe is incredibly versatile! Feel free to adjust the ingredients to suit your taste preferences or what you have on hand. Here are some notes and substitution ideas:
- Onion: I opted for a yellow onion, which provides a balanced sweetness and sharpness when sautéed. However, you can easily use a white onion for a slightly stronger flavor or a red onion if you prefer a touch more pungency and color.
- Garlic: As a true garlic enthusiast, I believe a minimum of three minced garlic cloves is essential for a robust flavor base. Don’t be shy with this aromatic – it’s key to a great chili!
- Olive Oil: Extra virgin olive oil lends a wonderful, subtle flavor to the chili. If you don’t have it, or prefer a neutral taste, any other high-heat vegetable oil will work perfectly, such as corn oil, sunflower oil, coconut oil, or avocado oil.
- Ground Meat Variations: While lean ground beef is my choice for this recipe, you can use any type of ground beef you have available. For a lighter alternative, consider substituting with ground chicken or ground turkey. Ground pork also makes a fantastic, flavorful chili. If you’re aiming for a vegetarian or vegan chili, simply use plant-based vegan ground beef crumbles.
- Tomato Paste: Tomato paste is a concentrated flavor powerhouse. It significantly deepens the intensity and richness of the tomato base. Remember, it’s distinct from tomato sauce or ketchup in its concentrated form and purpose.
- Salt Selection: I used fine table salt, which dissolves quickly and distributes evenly. Feel free to use fine sea salt or fine Himalayan pink salt if those are your preferences; adjust to taste as needed.
- Cumin Powder: Cumin powder adds a warm, earthy, and slightly nutty flavor that is characteristic of classic chili. If you find its flavor a bit strong, you can reduce the amount or omit it entirely based on your preference.
- Granulated Garlic: To further enhance the garlic flavor, I incorporate granulated garlic in addition to fresh minced garlic. This dual approach ensures a rich, deep garlic profile. Alternatively, an equal amount of garlic powder can be used.
- Ground Coriander: The bright, citrusy notes of ground coriander beautifully complement the earthiness of cumin, making them a perfect pairing in many savory dishes, including this chili. I highly recommend including it if you’re using cumin.
- Red Chili Powder for Heat: For that essential kick of spice, red chili powder is my choice. If you desire a different kind of heat or a different flavor profile, consider adding ground black pepper, sweet or smoked paprika powder, a pinch of potent cayenne pepper powder, or crushed red pepper flakes. If you prefer a milder chili, simply reduce the amount of chili powder or omit it.
- Broth Options: Beef broth provides a rich foundation that enhances the beef flavor. However, chicken broth or vegetable broth can be used as equally delicious alternatives, especially if adapting for different meat choices or a vegetarian version.
- Chopped Tomatoes: Canned chopped tomatoes are wonderfully convenient. For a fresher taste, you can certainly chop your own ripe tomatoes.
- Beans of Choice: I used cooked red kidney beans for their creamy texture and classic chili appearance. Canned beans are a time-saver, but feel free to cook dried beans from scratch if you prefer. Pinto beans or black beans are also excellent substitutes that offer a slightly different texture and flavor profile.
- Dairy-Free Mozzarella Cheese: To maintain the dairy-free nature of this recipe, I recommend shredded dairy-free mozzarella cheese as a delicious topping. If dairy is not an issue for you, regular mozzarella or cheddar cheese are classic and tasty options.
- Sweet Corn Kernels: A handful of cooked sweet corn kernels adds a lovely burst of color, a delightful texture, and a touch of sweetness that beautifully contrasts the savory and spicy notes of the chili. Canned or frozen (thawed) corn works wonderfully.
- Avocado: Diced fresh avocados are a fantastic addition, providing a creamy texture and a vibrant green color that brightens up the dish and adds healthy fats.
- Fresh Herbs: Fresh chopped parsley is my preferred garnish for its bright, clean flavor. However, feel free to experiment with other fresh herbs like cilantro for a more Southwestern twist, or basil for an unexpected but delightful aromatic touch.
Crafting Your Dutch Oven Chili: A Step-by-Step Guide
Making this flavorful chili con carne is a breeze with these easy-to-follow steps. Pay attention to each stage to build maximum flavor!
1. Sauté Onions and Garlic to Perfection
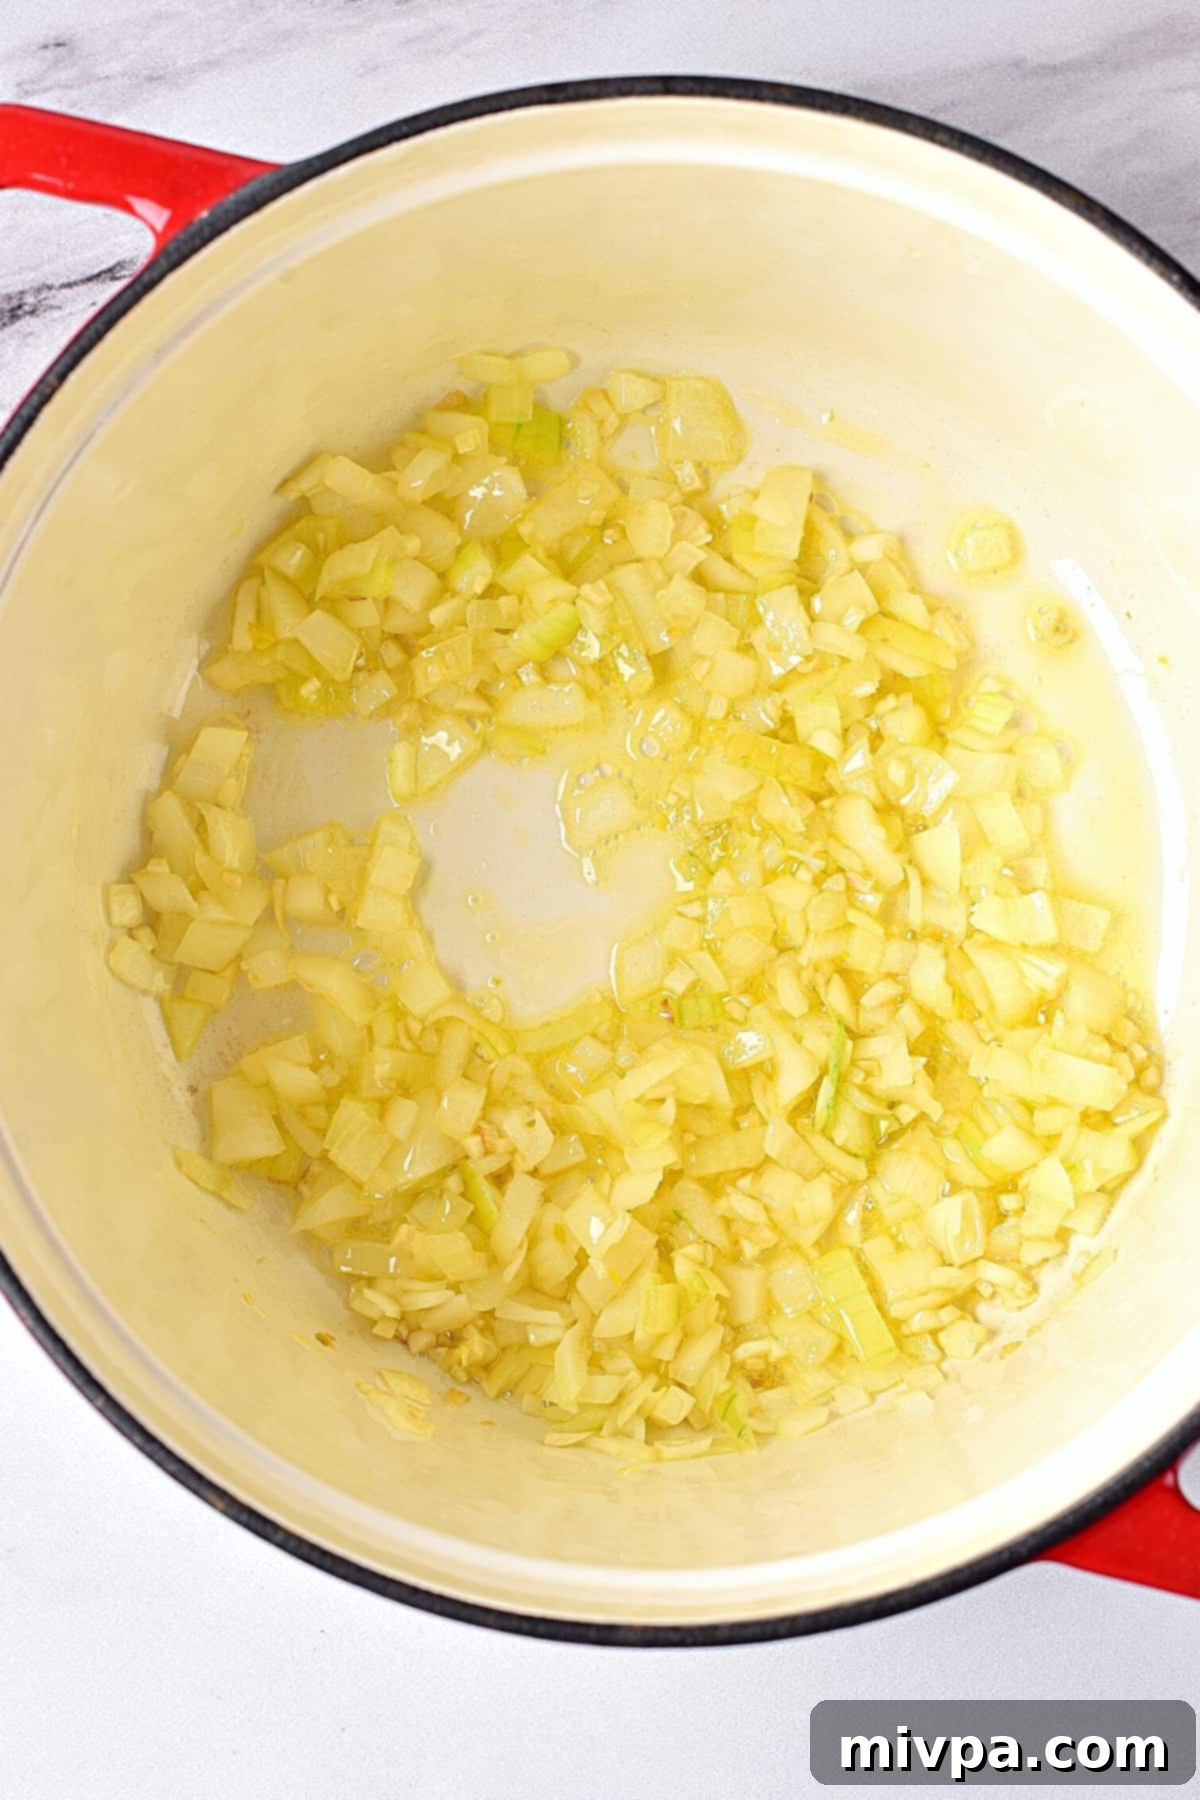
Begin by heating the olive oil in your sturdy 6-quart Dutch oven over medium-high heat. Once shimmering, add the finely chopped onions and minced garlic. Sauté them, stirring occasionally, until the onions become tender and translucent, and the garlic is fragrant, about 3-5 minutes. This aromatic base is crucial for a delicious chili.
2. Brown the Ground Beef
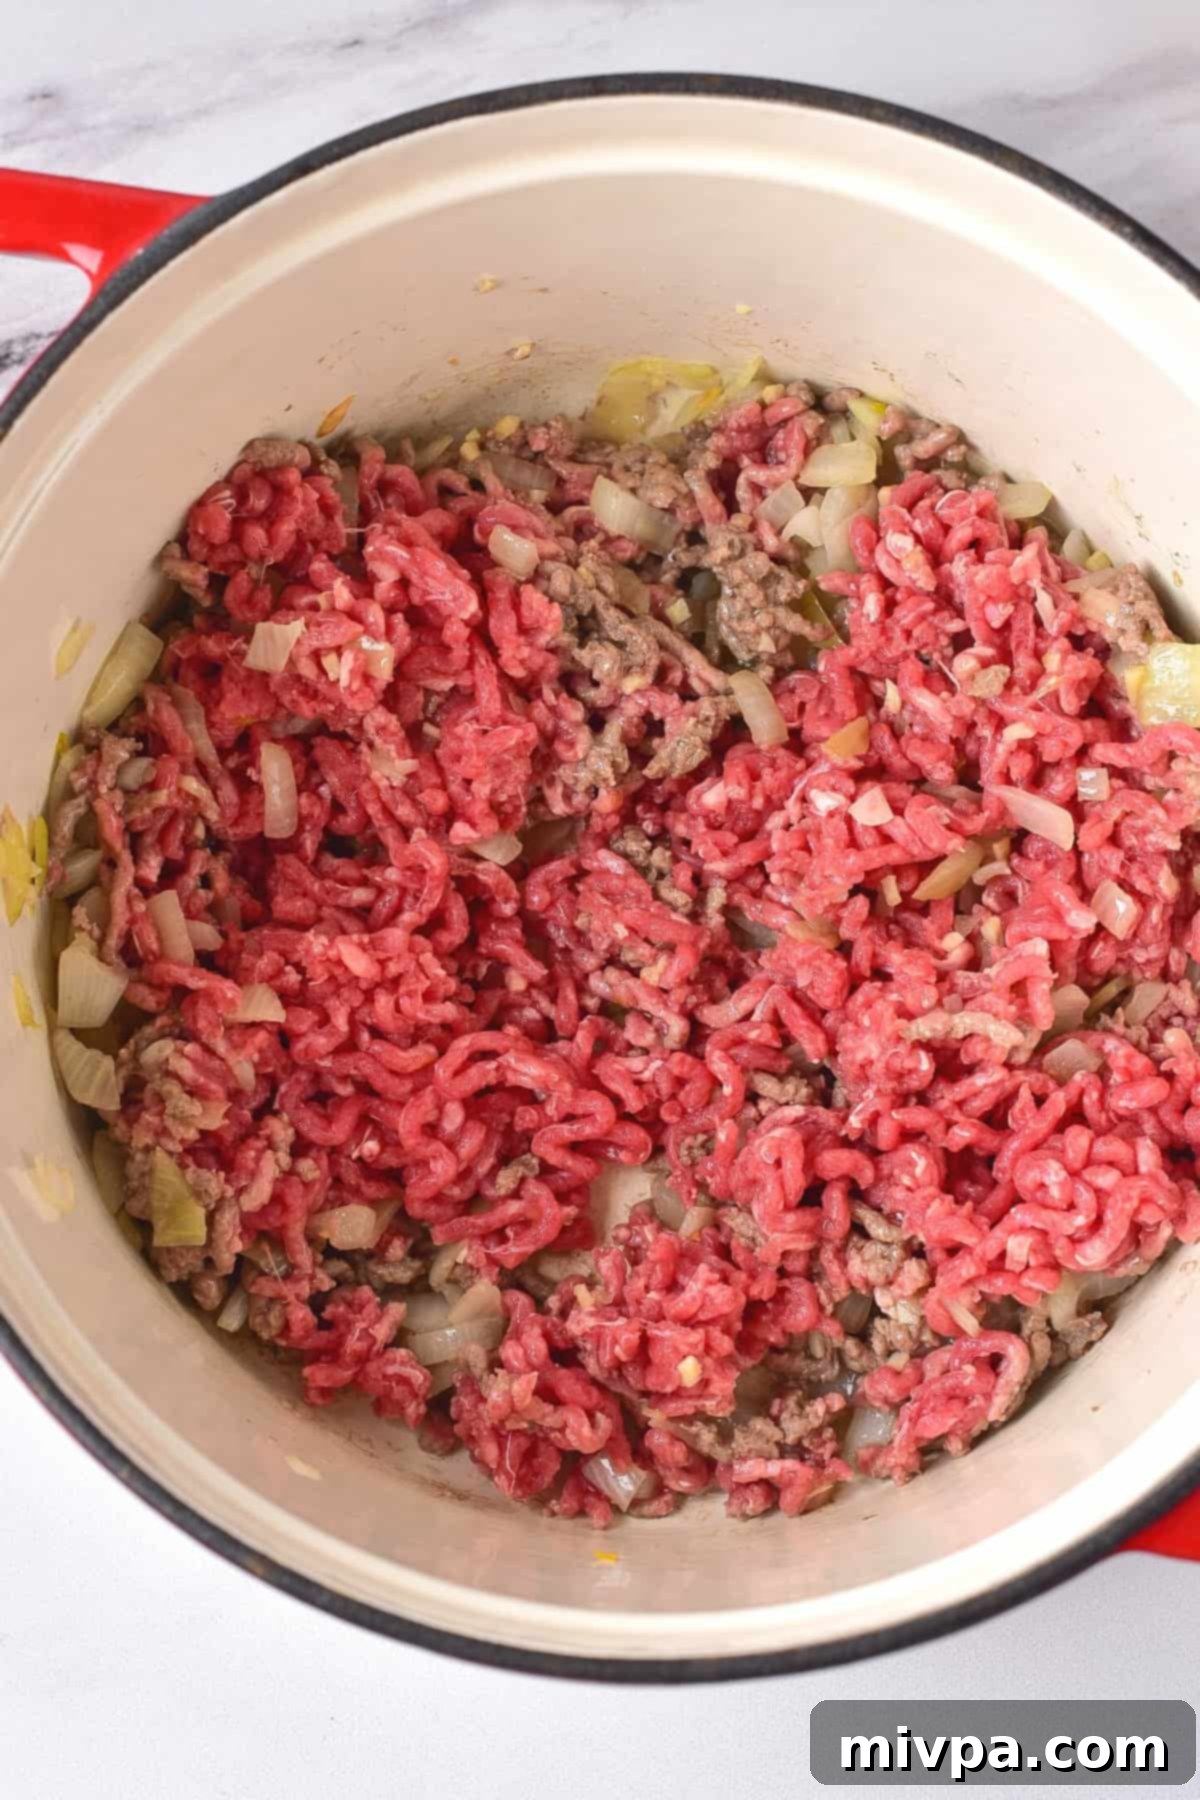
Next, add the ground beef to the Dutch oven with the softened onions and garlic. Break up the meat with a spoon or spatula as it cooks. Continue to sauté and stir for about 5 to 7 minutes, or until the beef is thoroughly cooked through and no longer pink. Drain any excess fat if necessary to keep the chili from becoming greasy.
3. Infuse with Tomato Paste, Salt, and Spices
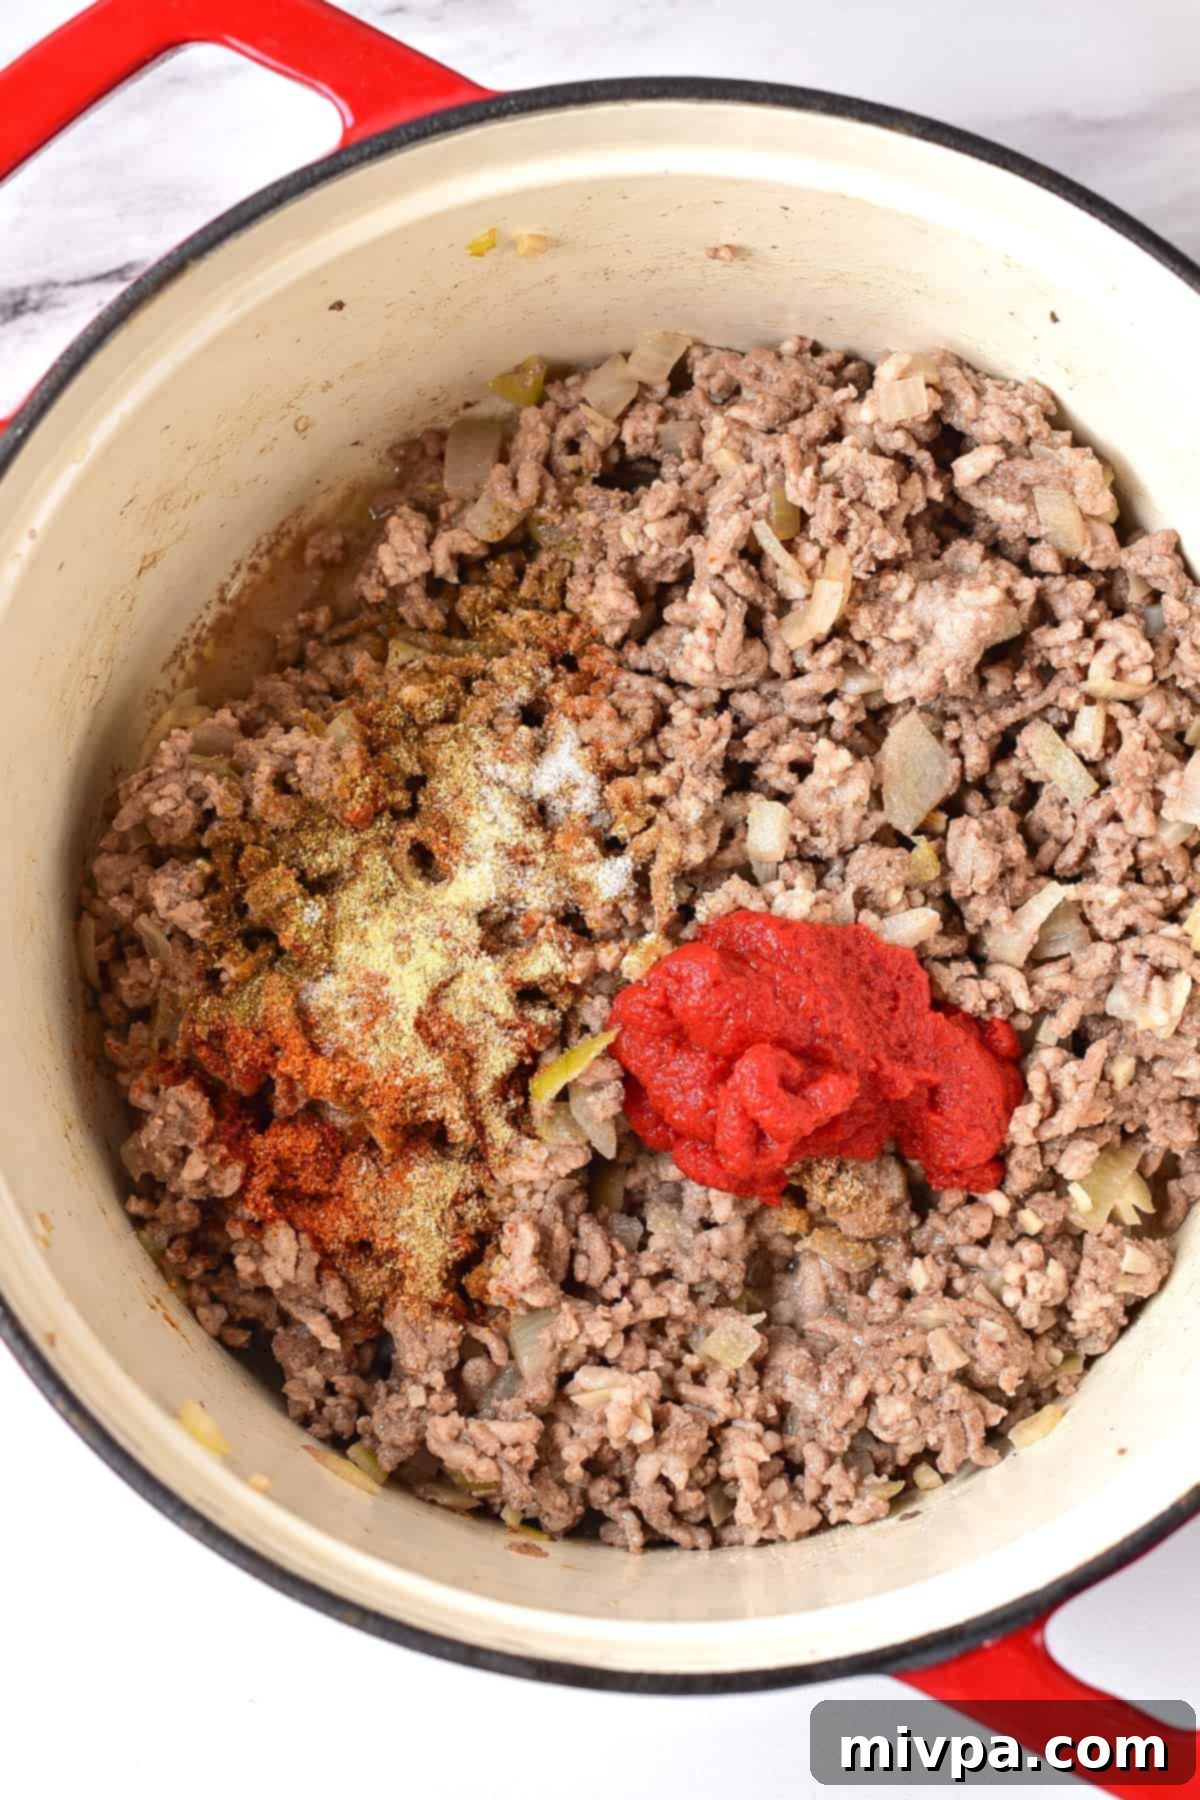
Now it’s time to build the flavor! Stir in the concentrated tomato paste, along with the salt and all your chosen spices. Mix everything thoroughly, ensuring the tomato paste coats the beef and the spices are well distributed. This step helps to bloom the spices and deepen their flavor.
4. Combine Broth, Chopped Tomatoes, and Beans
Pour in the rich beef broth, add the canned chopped tomatoes (with their juices for extra flavor), and stir in the thoroughly drained red kidney beans. Give everything a good stir to combine all the wonderful ingredients.
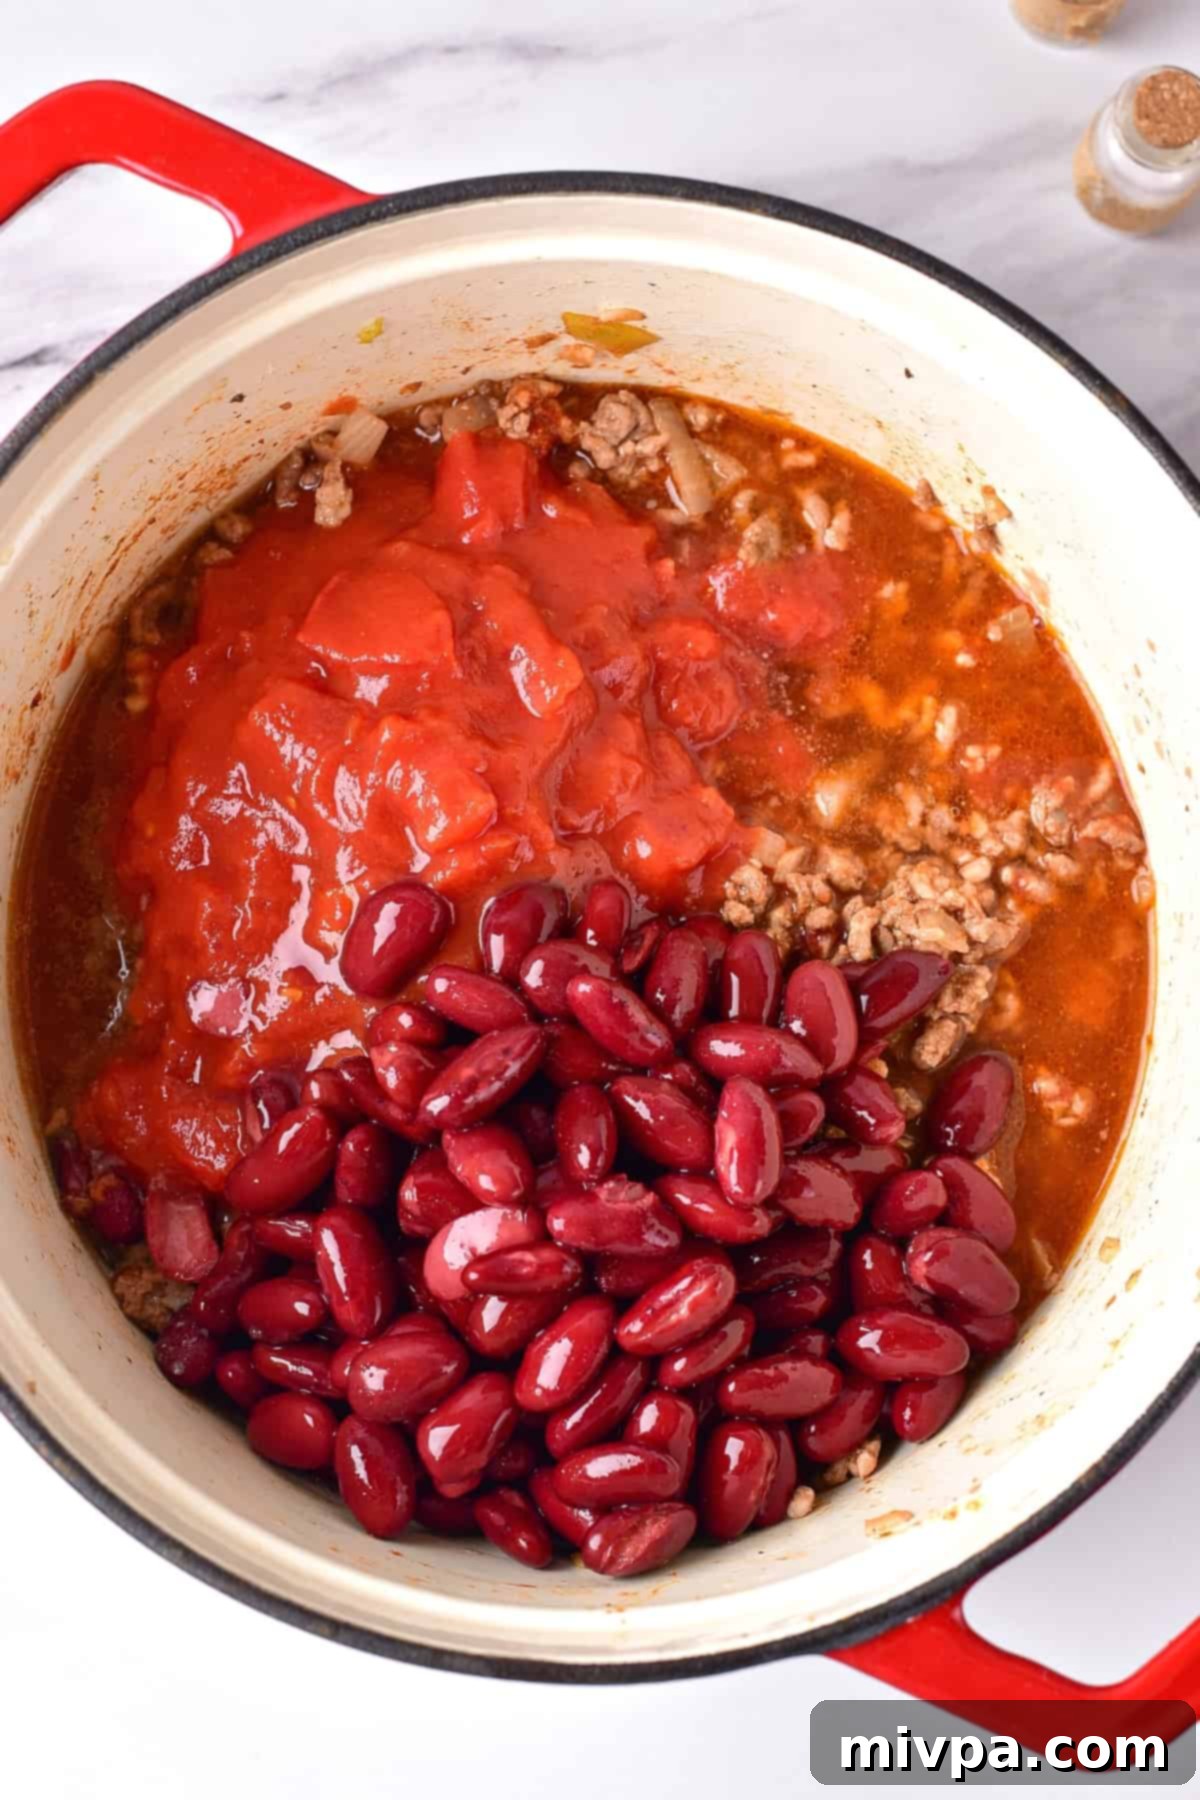
5. Simmer to Perfection
Once all ingredients are thoroughly mixed, bring the chili to a gentle simmer. Reduce the heat to low, cover the Dutch oven, and let it simmer for a minimum of 30 minutes. Make sure to stir well every 10 minutes to prevent sticking and ensure even cooking and flavor development. This simmering period allows all the flavors to meld beautifully.
(PRO TIP: If you prefer your chili to have a thinner consistency, simply add a bit more broth at this stage, stir well, and let it simmer for an additional 5 minutes to incorporate.)
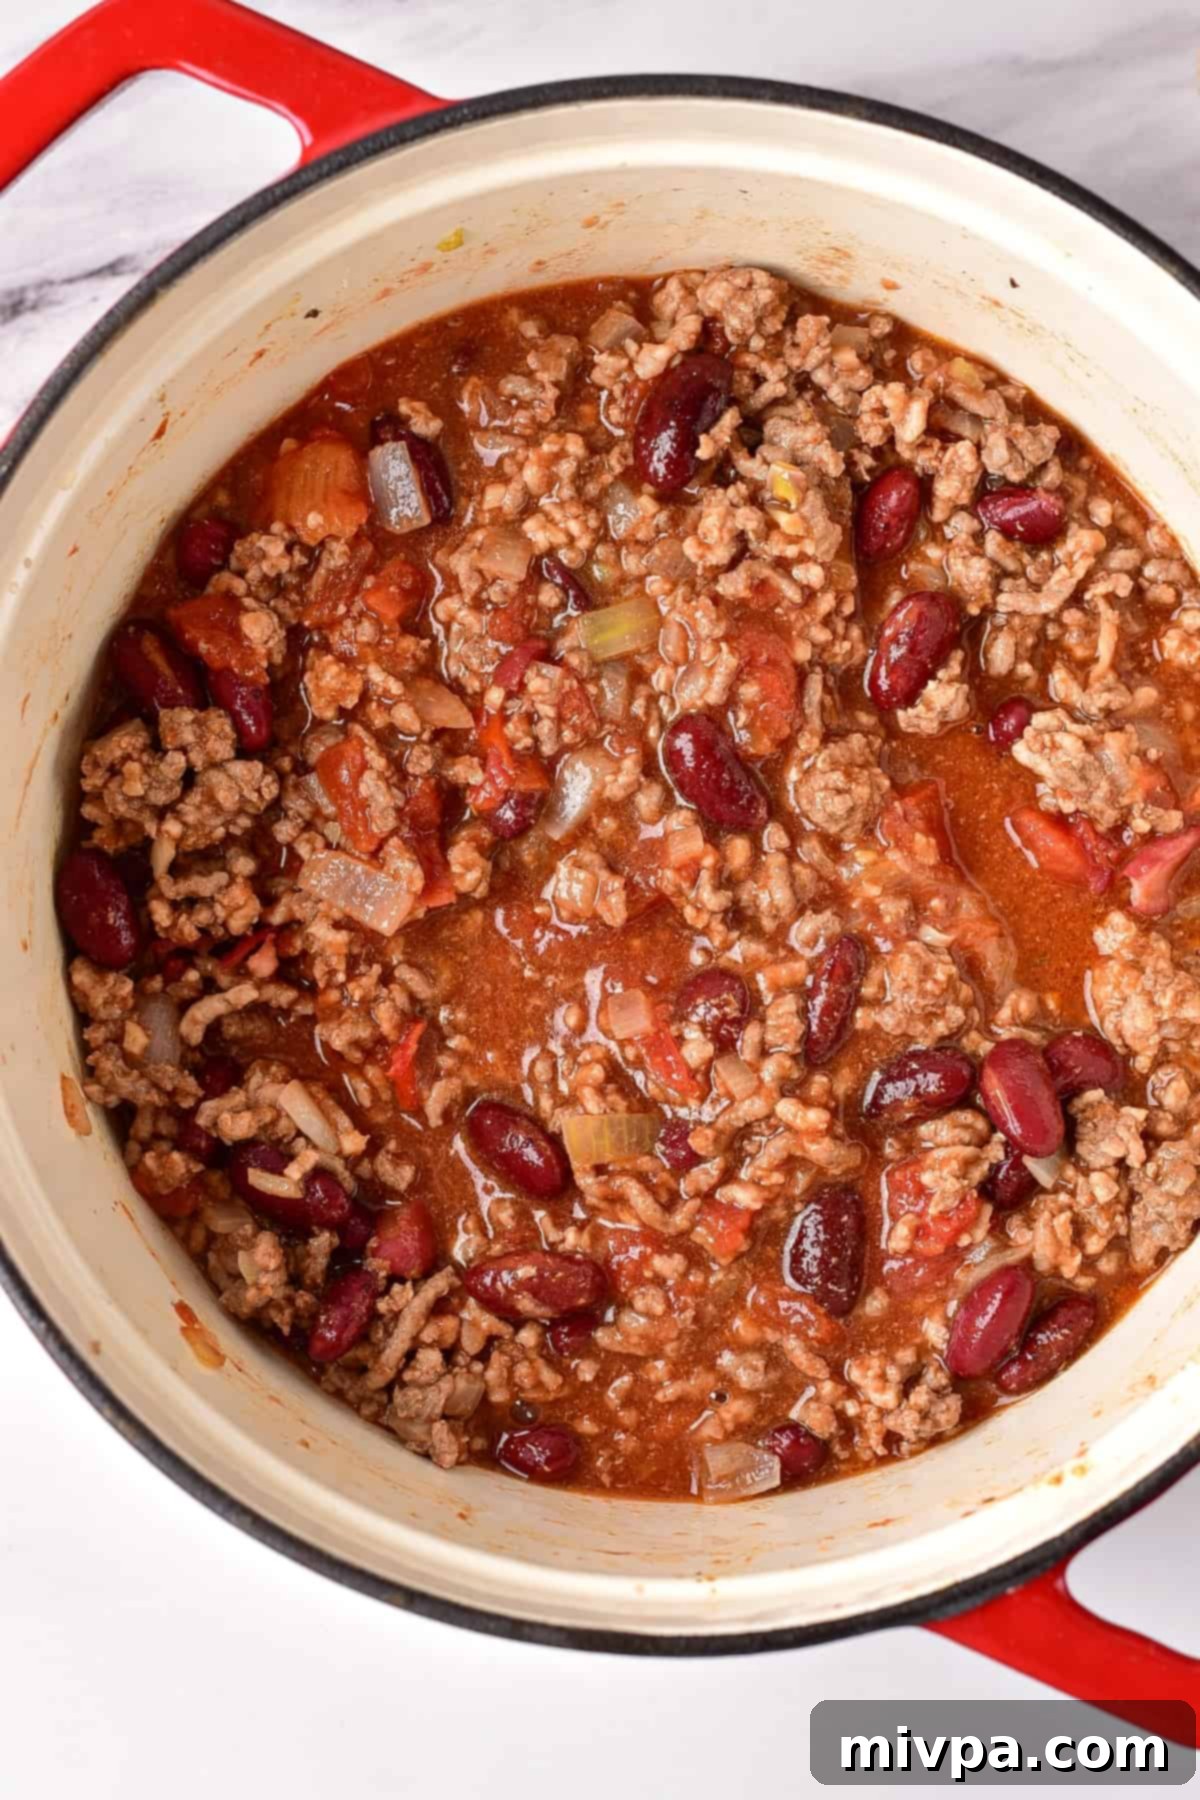
6. Garnish and Serve Your Delicious Chili
Once your chili has simmered to perfection and reached your desired consistency, it’s ready to be served! Ladle generous portions into bowls and let everyone customize their dish with their favorite toppings. Popular options include grated dairy-free mozzarella cheese for a creamy finish, sweet corn kernels for a pop of color and sweetness, a dollop of sour cream (or dairy-free alternative), fresh diced avocado for healthy fats, or a sprinkle of fresh herbs like parsley or cilantro. Enjoy your homemade, hearty chili!

Dish by Dish Tips & Tricks for the Best Dutch Oven Chili
Elevate your chili experience with these additional tips and creative ideas:
- Experiment with Different Ground Meats: While beef is traditional, this chili recipe is incredibly adaptable. Feel free to substitute the ground beef with ground chicken, ground turkey, or even ground pork for a different flavor profile. For a delicious vegetarian option, simply use vegan ground beef crumbles, ensuring a rich and satisfying meal for everyone.
- Mix Up Your Beans: I used red kidney beans for their classic texture and appearance, but don’t limit yourself! Pinto beans or black beans are excellent alternatives that can introduce a slightly different earthiness and texture to your chili. A mix of different beans can also add complexity.
- Boost the Heat with Fresh Peppers: If you love a fiery kick, consider adding some fresh peppers. Beyond chili powder, you can finely dice and sauté a red bell pepper for mild sweetness, a jalapeño pepper for moderate heat, or chipotle peppers for a smoky, spicy depth. Adjust the quantity to your preferred spice level.
- Scale the Recipe for Any Crowd: This stovetop Dutch oven chili recipe is perfect for scaling. Easily double or triple the ingredients to feed a large gathering or for convenient meal prepping. You can also make a larger batch and freeze portions for quick and easy meals later on.
- Utilize Your Slow Cooker: If you prefer a hands-off approach, this recipe can be easily adapted for a slow cooker. After browning the meat and sautéing the aromatics (steps 1-3), simply combine all chili ingredients (except for toppings) in your slow cooker. Cook on low for 6-8 hours or on high for 3-4 hours until the flavors have melded beautifully.
- Serving Suggestions for Chili: Chili is incredibly versatile when it comes to serving. I highly recommend pairing it with crunchy tortilla chips for scooping, a slice of warm jalapeño cornbread for a spicy and sweet contrast, or soft cornbread muffins. It’s also delicious over rice, baked potatoes, or even hot dogs for a chili dog!
Recipe FAQs: Your Chili Questions Answered
To maintain freshness and flavor, place any leftover chili in an airtight container. It can be safely stored in the refrigerator for up to 5 days. When you’re ready to enjoy it again, simply reheat it in the microwave or gently warm it on the stovetop over medium-low heat until it’s heated through.
Absolutely! Chili freezes beautifully. Once the chili con carne has cooled completely, transfer it to a freezer-safe container or individual freezer bags. It can be stored in the freezer for up to 2 months. For best results, allow the chili to thaw completely in the refrigerator overnight before reheating in the microwave or in a pot on the stovetop until simmering hot.
I highly recommend using an enamelled Dutch oven when cooking chili con carne. The reason for this is that chili contains acidic ingredients, primarily tomatoes. The acidity in tomatoes can react with raw, regular cast iron, potentially leading to a metallic taste in your food and, over time, can cause corrosion or strip the seasoning from your cast iron. An enamel coating provides a non-reactive surface, ensuring your chili tastes pure and your Dutch oven remains in excellent condition.

More Delicious Gluten-Free Dutch Oven Recipes to Explore
- Hearty & Easy Beef Stew (Gluten-Free, Dairy-Free)
- Simple No-Knead Artisan Bread (Gluten-Free, Dairy-Free)
- Perfect Stovetop Popcorn (Gluten-Free, Vegan Option)
- Comforting Chicken Casserole (Gluten-Free, Dairy-Free)
Other Gluten-Free Dinner Recipes You’ll Love:
- Baked Chicken Legs and Potatoes (Gluten-Free, Dairy-Free)
- Mexican Chicken Meatballs (Gluten-Free, Dairy-Free)
- Easy Chicken Satay with Peanut Sauce (Gluten-Free, Dairy-Free)
- Crispy Cornflake Chicken Strips (Gluten-Free, Dairy-Free)
P.S. We genuinely hope you enjoy making and savoring this delicious Dutch oven chili con carne! If you try this recipe, we’d be thrilled if you could leave a star rating below and/or a thoughtful review in the comment section further down the page. Your feedback is always greatly appreciated and helps us improve. Don’t forget to explore our entire Recipe Index for all the exciting dishes on the blog. You can also follow us on Pinterest, Facebook, or Instagram to stay updated. Sign up for our Email List to receive fresh, gluten-free recipes directly in your inbox each week!
Print

Easy Dutch Oven Chili (Gluten-Free, Dairy-Free)
5 Stars 4 Stars 3 Stars 2 Stars 1 Star
5 from 1 review
Author: Felicia Lim
Total Time: 50 minutes
Yield: 4 servings
Diet: Gluten Free
Description
This easy stovetop Dutch oven chili is a truly wholesome and hearty meal, perfect for warming up a crowd on a chilly evening. Simple to cook, incredibly flavorful, and utterly delicious, this beef chili recipe is a fantastic main dish that brings comfort and joy. It’s also fully gluten-free and dairy-free, making it a great option for diverse dietary needs.
Ingredients
Units
Scale
- 1 yellow onion, chopped
- 3 garlic cloves, minced
- 2 tablespoons olive oil
- 1 pound lean ground beef
- 1 tablespoon tomato paste
- 1 teaspoon salt
- 1/2 teaspoon cumin powder
- 1/2 teaspoon granulated garlic
- 1/2 teaspoon ground coriander
- 1/2 teaspoon red chili powder
- 1 cup beef broth
- 1 cup canned chopped tomatoes in tomato juice
- 1 cup canned red kidney beans, drained
- 1/4 cup shredded dairy-free mozzarella cheese, for topping (optional)
- 1/4 cup sweet corn kernels, for topping (optional)
- 1/4 cup diced avocado, for topping (optional)
- 1 tablespoon fresh chopped parsley, for topping (optional)
Instructions
- Sauté Onions and Garlic: Heat up the olive oil in a large Dutch oven over medium-high heat. Add the chopped onions and minced garlic, then sauté, stirring occasionally, until the onions are tender and translucent (about 3-5 minutes).
- Add Ground Beef: Introduce the ground beef to the Dutch oven. Sauté and stir, breaking up the meat with a spoon, for another 5 to 7 minutes, until the beef is fully cooked through and browned.
- Add Tomato Paste, Salt and Spices: Stir in the tomato paste, salt, and all the spices. Mix thoroughly until everything is well combined and fragrant.
- Add Broth, Chopped Tomatoes and Beans: Pour in the beef broth, add the chopped tomatoes in their juice, and finally, the drained red kidney beans. Stir everything together gently.
- Simmer: Bring the mixture to a gentle simmer. Reduce the heat to low, cover the Dutch oven, and let it simmer for 30 minutes, stirring well every 10 minutes. Tip: If you desire a thinner chili, simply add more broth, then stir and simmer for an additional 5 minutes to reach your preferred consistency.
- Garnish and Serve: Serve this wonderfully flavorful chili hot with your choice of favorite toppings. Delicious options include grated dairy-free mozzarella cheese, sweet corn kernels, a dollop of sour cream (or dairy-free alternative), fresh diced avocado, or a sprinkle of fresh herbs.
Notes
Onion: For this recipe, a yellow onion works perfectly to create a balanced flavor profile. However, you can easily substitute it with a white onion for a slightly more pungent kick or a red onion if you prefer its distinct flavor and color in your chili.
Garlic: As a strong believer in robust flavors, I find that at least three good-sized garlic cloves are essential to impart a deep, aromatic base to this chili. Feel free to add more if you’re a garlic lover!
Olive Oil: Extra virgin olive oil adds a lovely undertone to the chili’s base. If you don’t have it or prefer a different cooking fat, other vegetable oils such as corn oil, sunflower oil, coconut oil, or avocado oil can be used interchangeably.
Ground Meat: While I opted for lean ground beef to keep the chili lighter, any type of ground beef will work well. For variations, consider using ground chicken, ground turkey, or ground pork to alter the flavor. If you’re aiming for a vegetarian dish, vegan ground beef crumbles are an excellent, satisfying substitute.
Tomato Paste: The tomato paste is crucial for intensifying the rich, deep tomato flavor in the chili. It’s a concentrated ingredient, distinctly different from regular tomato sauce or ketchup, providing a vital layer of umami.
Salt: Fine table salt was used here for quick dissolution. You can easily substitute with fine sea salt or fine Himalayan pink salt, adjusting the quantity to taste. Always taste and adjust seasonings at the end!
Cumin Powder: Cumin powder adds a distinctive warm and earthy flavor that is characteristic of classic chili. If you find the flavor of ground cumin too potent for your palate, feel free to reduce the amount or omit it entirely.
Granulated Garlic: To truly enhance the garlic profile, I use granulated garlic in addition to fresh garlic. This ensures a rich, layered garlic taste. Alternatively, you can use garlic powder in the same measurements.
Ground Coriander: Ground coriander pairs beautifully with cumin, adding a bright, slightly citrusy note that complements the other savory flavors in this chili. If you’re using cumin, I highly recommend including coriander for a more complex spice blend.
Red Chili Powder: For those who appreciate a bit of heat, red chili powder provides a perfect kick. If you want to vary the spice, consider adding paprika powder for smokiness or sweetness, cayenne pepper powder for a sharper heat, or crushed red chili flakes for visible heat. For a milder chili, simply omit or reduce the chili powder.
Beef Broth: Beef broth forms a rich liquid base that deepens the overall flavor. You can substitute with chicken broth or vegetable broth depending on what you have on hand or your dietary preference.
Chopped Tomatoes: Canned chopped tomatoes are a convenient and consistent choice. If fresh tomatoes are in season and you prefer, you can certainly chop your own for a vibrant taste.
Red Kidney Beans: Cooked red kidney beans are traditional for their texture and color. Canned beans offer excellent convenience, but you can also cook dried beans if you have time. Pinto beans or black beans are also fantastic and widely used alternatives.
Mozzarella Cheese: To maintain the dairy-free nature of this recipe, shredded dairy-free mozzarella cheese is recommended for topping. If dairy is not a concern, regular mozzarella or cheddar cheese are classic and delicious choices.
Sweet Corn Kernels: Adding a handful of cooked sweet corn kernels (canned or thawed frozen) provides a lovely burst of color, a tender texture, and a touch of sweetness that beautifully complements the savory and spicy elements of the chili.
Avocado: Diced avocado offers a creamy texture and a fresh, vibrant green contrast that makes the chili visually appealing and adds healthy fats.
Parsley: Fresh chopped parsley is a bright and refreshing garnish. Feel free to use other fresh herbs like cilantro for a more traditional Southwestern flavor, or basil for an interesting aromatic twist.
Storing/Freezing: To store leftovers, place cooled chili in an airtight container and refrigerate for up to 5 days. Reheat gently on the stovetop or in the microwave. For longer storage, freeze cooled chili in a freezer-safe container or individual freezer bags for up to 2 months. Thaw completely before reheating.
- Prep Time: 5 mins
- Cook Time: 45 mins
- Category: Main Dish
- Method: Stovetop
- Cuisine: American
