Easy & Delicious Gluten-Free Dairy-Free Jam Thumbprint Cookies
Indulge in the nostalgic comfort of these homemade gluten-free thumbprint cookies, crafted with a tender sugar cookie dough that’s gently rolled in sugar, then perfectly pressed and filled with luscious, sweet jam. Not only are they incredibly delicious, but they are also completely dairy-free, making them a treat for everyone. Whip up a batch of these delightful cookies today and savor every bite with a warm mug of your favorite tea!

Embrace Nostalgia with Delicious Thumbprint Cookies!
There’s something truly magical about a classic cookie that transports you back to childhood. For me, it was my mum’s raspberry jam tartlets – a sweet surprise we’d devour in mere seconds. These jam thumbprint cookies are a heartfelt tribute to those cherished memories, reimagined for modern dietary needs.
These delightful cookies are more than just a treat; they’re a callback to simpler times, perfect for sharing with loved ones. While they’re fantastic with a comforting mug of tea any time of year, they hold a special charm during the holiday season. I genuinely hope these easy-to-make, gluten-free, and dairy-free thumbprint cookies bring as much joy to your home as they do to ours.
Why This Gluten-Free & Dairy-Free Thumbprint Cookie Recipe is a Must-Try:
If you’re looking for a reliable, delicious, and diet-friendly cookie recipe, you’ve come to the right place. Here’s why these thumbprint cookies will quickly become a staple in your baking repertoire:
- Dietary Friendly for All: The most significant advantage of this recipe is that it’s 100% gluten-free and dairy-free. This means individuals with Celiac disease, gluten sensitivities, or lactose intolerance can enjoy these sweet treats without any worries or compromise on flavor.
- Simple, Accessible Ingredients: You won’t need to hunt for obscure items. All the main ingredients required for these gluten-free thumbprint cookies are readily available at your local grocery store. We focus on common pantry staples to make baking easy and stress-free.
- Effortless Preparation: Don’t let the delicious outcome fool you into thinking these are complicated. Preparing these jam thumbprint cookies is straightforward. It primarily involves mixing the dough ingredients, chilling the dough (a crucial step for texture!), shaping them into small balls, creating the iconic indent, filling with your favorite jam, and baking. It’s a fantastic recipe for bakers of all skill levels.
- Versatile Filling Options: While classic jam is wonderful, this recipe allows for endless creativity. You can experiment with various jam flavors or even other fillings like chocolate ganache or lemon curd to suit your preference, making these cookies adaptable to any craving or occasion.
- Perfect for Any Occasion: From cozy afternoon tea breaks to festive holiday platters, these jam thumbprint cookies are versatile. Their appealing appearance and delightful taste make them a fantastic addition to parties, potlucks, or simply as a comforting treat at home.

Essential Ingredients for Perfect Gluten-Free Thumbprint Cookies:
Crafting these delectable gluten-free and dairy-free thumbprint cookies starts with a selection of common yet crucial ingredients. Here’s a detailed look at what you’ll need and why each component is important:
(For precise measurements and the full recipe, please scroll down to the printable recipe card at the bottom of this post.)
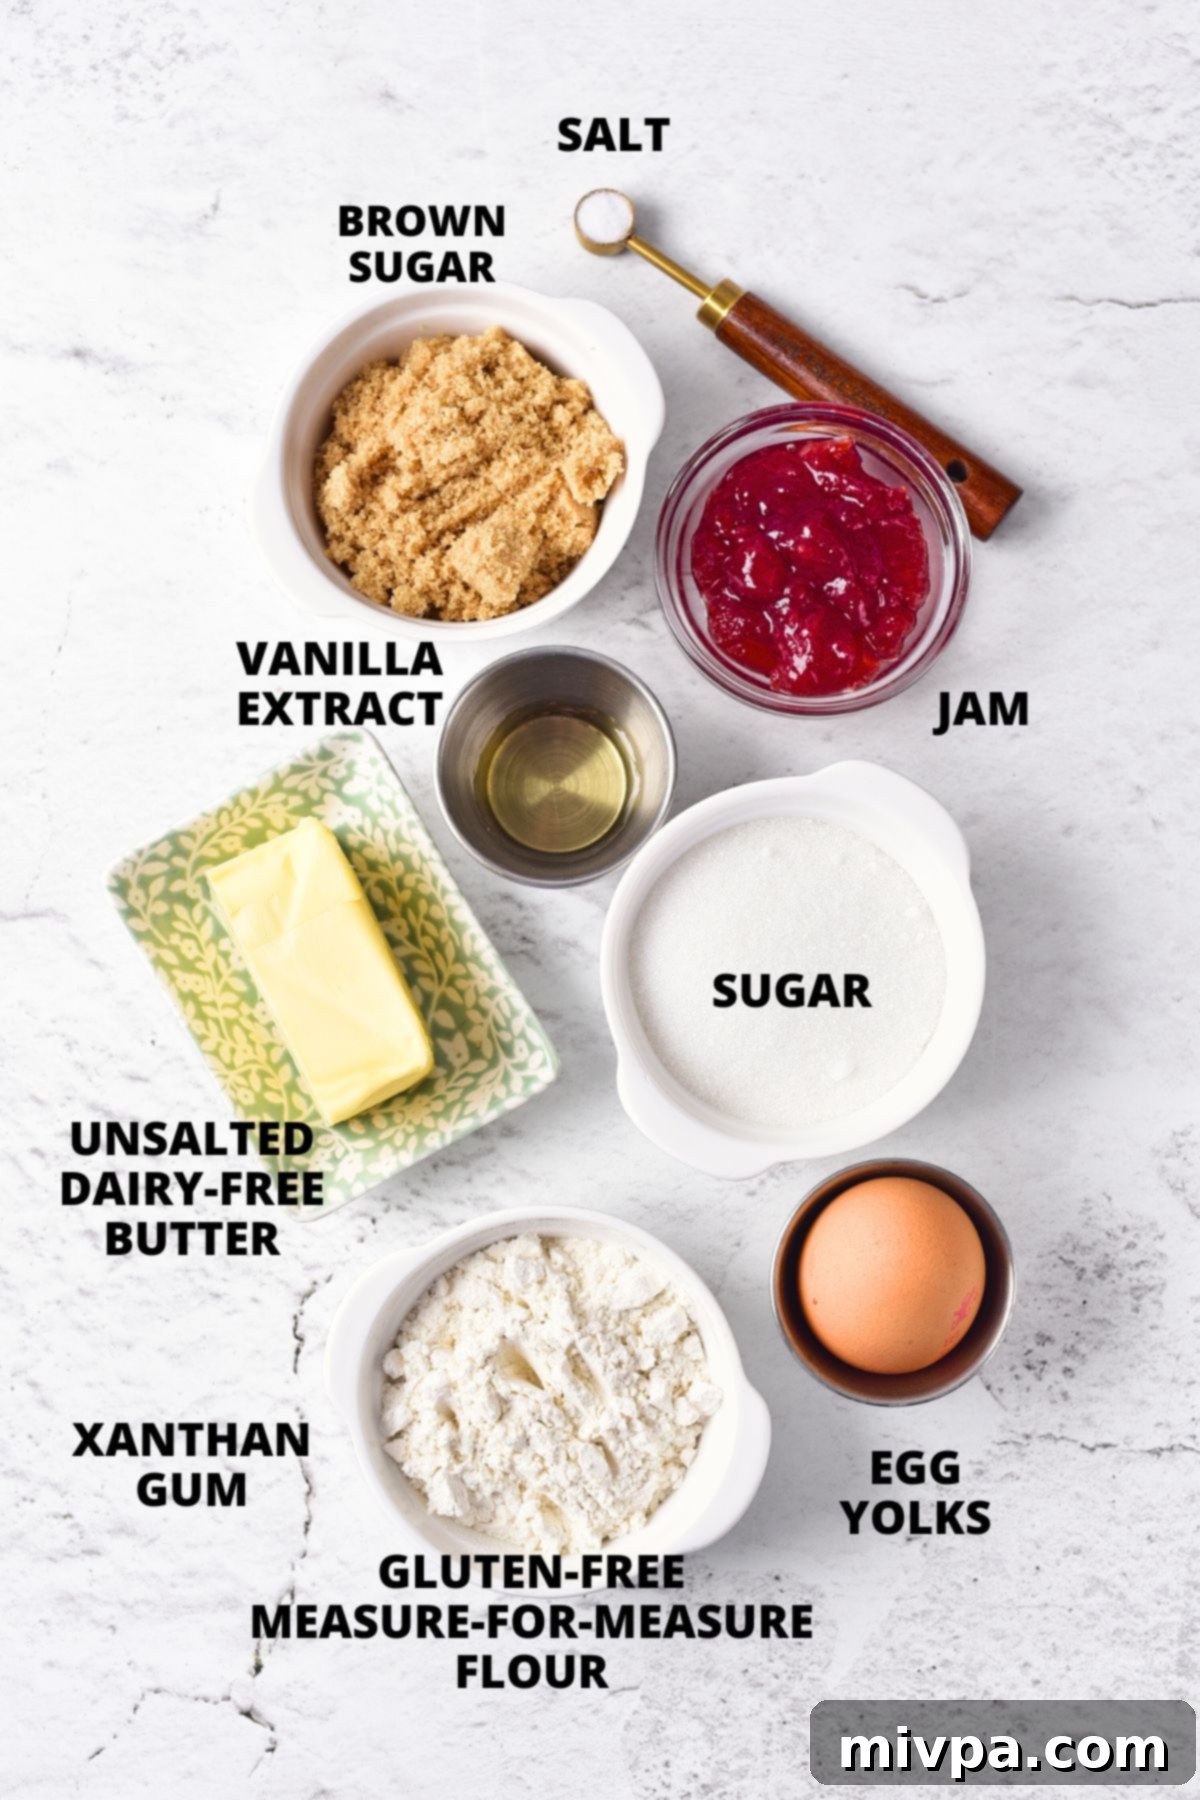
Recipe Notes & Expert Substitutions:
Understanding each ingredient’s role and potential substitutions can make your baking experience even better:
- Dairy-Free Butter: To ensure these classic holiday cookies remain completely dairy-free, I opt for unsalted dairy-free butter (also known as vegan butter). If you don’t have lactose intolerance or dairy allergies, feel free to use regular unsalted butter in its place. The key is to use softened butter for a smooth, fluffy dough.
- White Sugar: This provides the primary sweetness and contributes to the cookie’s tender texture. I use granulated white sugar, but cane sugar is a great alternative if you prefer. You’ll also use a bit extra for rolling the dough balls for that delightful sugary crust.
- Brown Sugar: The addition of brown sugar adds a subtle caramel note and helps keep the cookies moist and chewy. Light brown sugar is my preference, but dark brown sugar will offer a richer, deeper flavor, and coconut sugar can be used for a slightly less refined option.
- Egg: The egg is a crucial binding agent, holding all the ingredients together and adding structure to the dough. Ensure you don’t skip this ingredient for the best results.
- Vanilla Extract: A touch of vanilla extract is highly recommended to enhance the overall flavor profile of the cookies, adding warmth and depth. Don’t underestimate its power to elevate your bake!
- Gluten-Free Flour Blend: The success of gluten-free baking heavily relies on the right flour. I strongly recommend using a high-quality gluten-free measure-for-measure flour blend that acts as a 1:1 substitute for regular all-purpose flour. Look for blends primarily composed of lighter flours and starches like rice flour, tapioca starch, corn starch, or potato starch. Avoid blends heavy in garbanzo bean flour or other strong-flavored pulse flours, as they can result in a grainy texture and undesirable taste.
- Xanthan Gum: This is an essential ingredient in many gluten-free recipes, as it mimics the elasticity and binding properties of gluten. If your chosen gluten-free flour blend doesn’t already list xanthan gum as an ingredient, make sure to add xanthan gum separately to prevent crumbly cookies.
- Salt: A pinch of salt balances the sweetness of the cookies and enhances all the other flavors.
- Jam: I typically use sweet strawberry jam, but the beauty of thumbprint cookies is their versatility. Feel free to use your favorite! Popular choices include apricot jam, plum jam, mixed berry jam, blueberry jam, blackberry jam, or classic raspberry jam. Choose a good quality jam with a vibrant flavor for the best results.
How to Make Gluten-Free & Dairy-Free Thumbprint Cookies: A Step-by-Step Guide
Follow these detailed steps to create a batch of perfect, jam-filled thumbprint cookies. The process is straightforward and yields incredibly satisfying results!
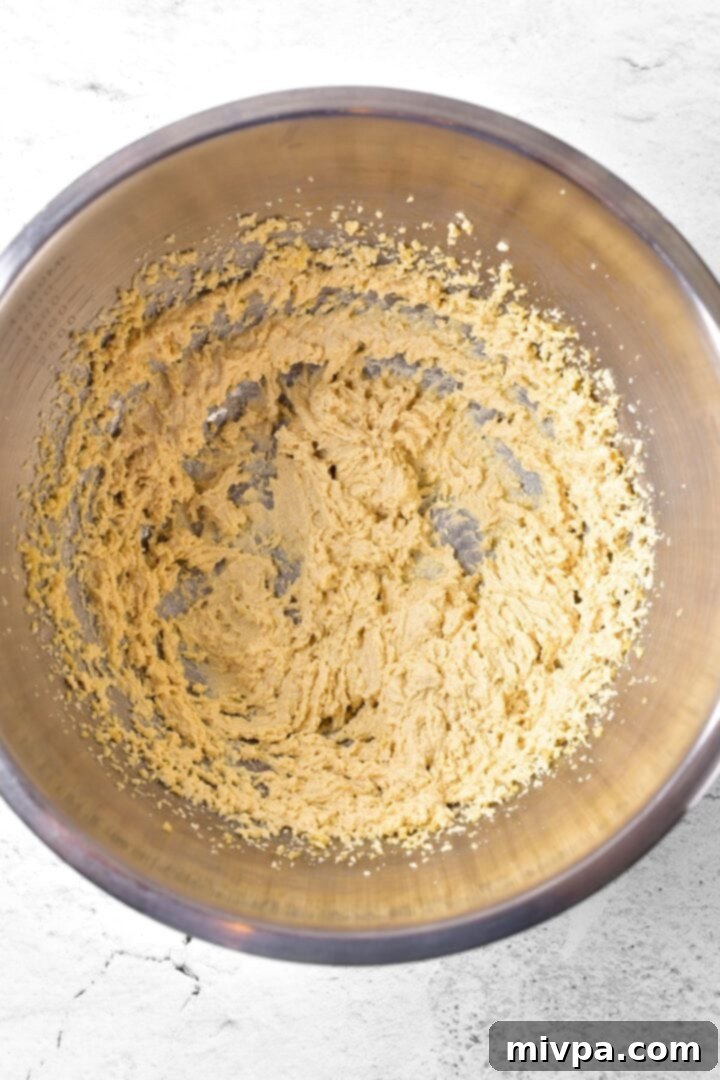
1. Beat Butter and Sugar Until Fluffy
In a large mixing bowl, combine the softened dairy-free butter with both the light brown sugar and white sugar. Using an electric mixer, beat the mixture on medium speed for approximately 3-4 minutes, or until it becomes light, pale, and wonderfully fluffy. This step incorporates air, which contributes to the cookies’ tender texture.
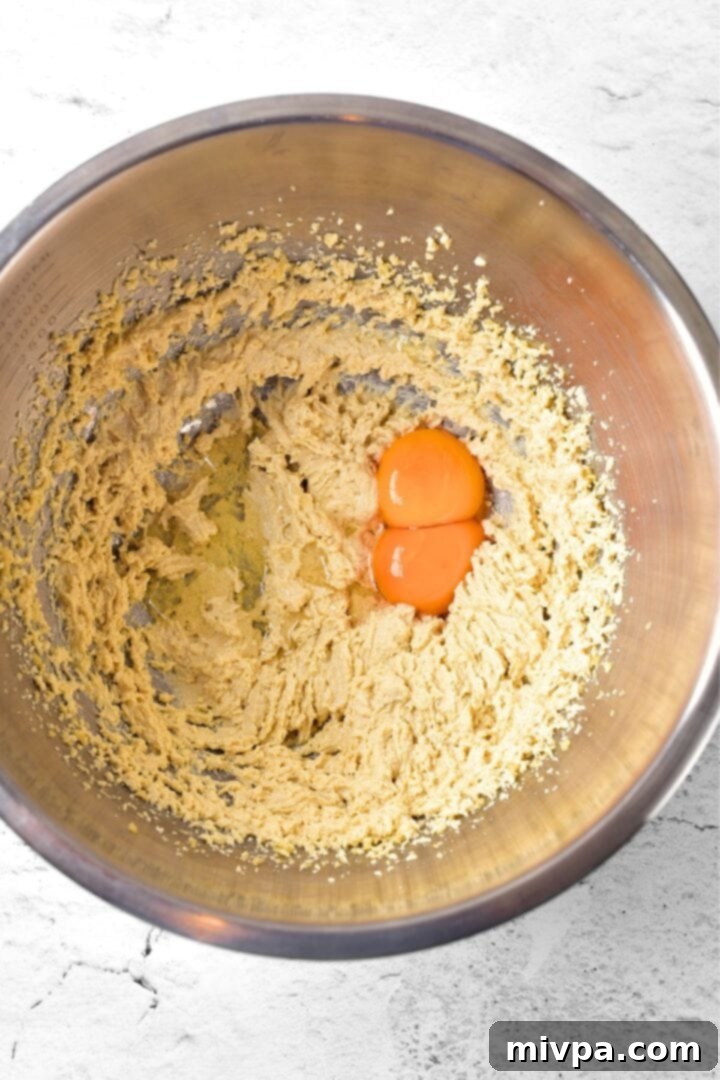
2. Incorporate Egg and Vanilla Extract
Crack the egg into the butter-sugar mixture, then add the vanilla extract. Beat again on medium speed for another minute or two, ensuring the egg and vanilla are fully incorporated into the dough, creating a smooth, cohesive base.
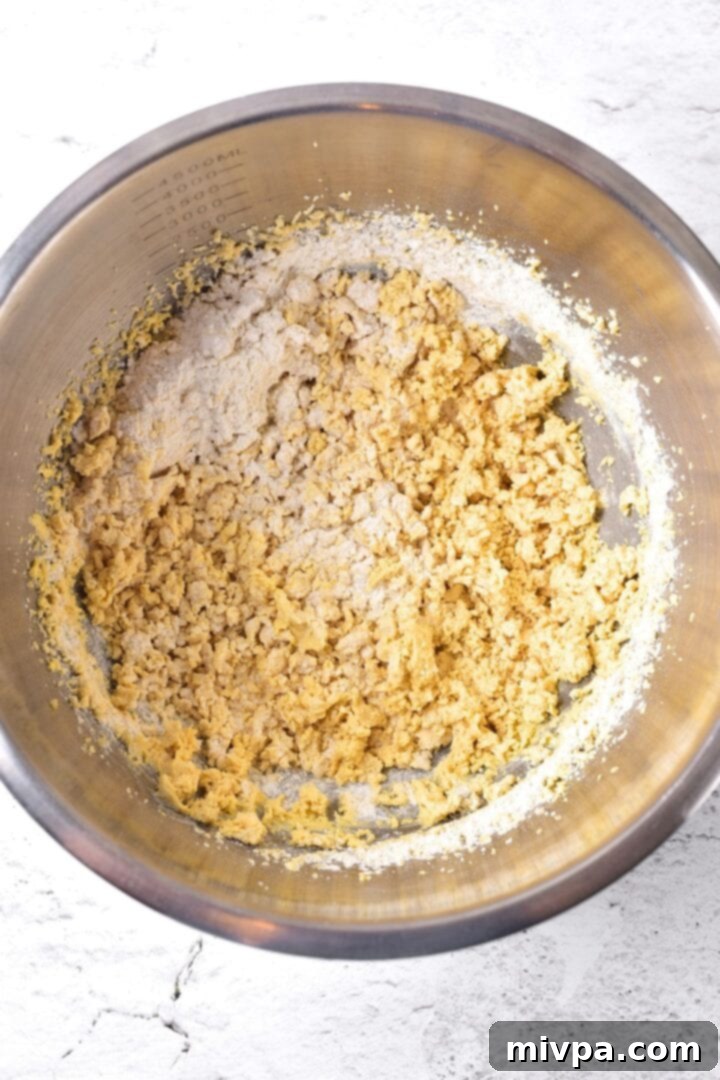
3. Mix in Gluten-Free Flour, Xanthan Gum, and Salt
In a separate, medium-sized bowl, whisk together the gluten-free measure-for-measure flour, xanthan gum (if your flour blend doesn’t already contain it), and salt. Gradually add half of this dry mixture to the wet ingredients, beating on low speed until just combined. Then, add the remaining flour mixture, continuing to beat until a pliable dough forms. Be careful not to overmix; stop once the dough comes together and is neither too wet nor too dry.
4. Chill the Dough Properly
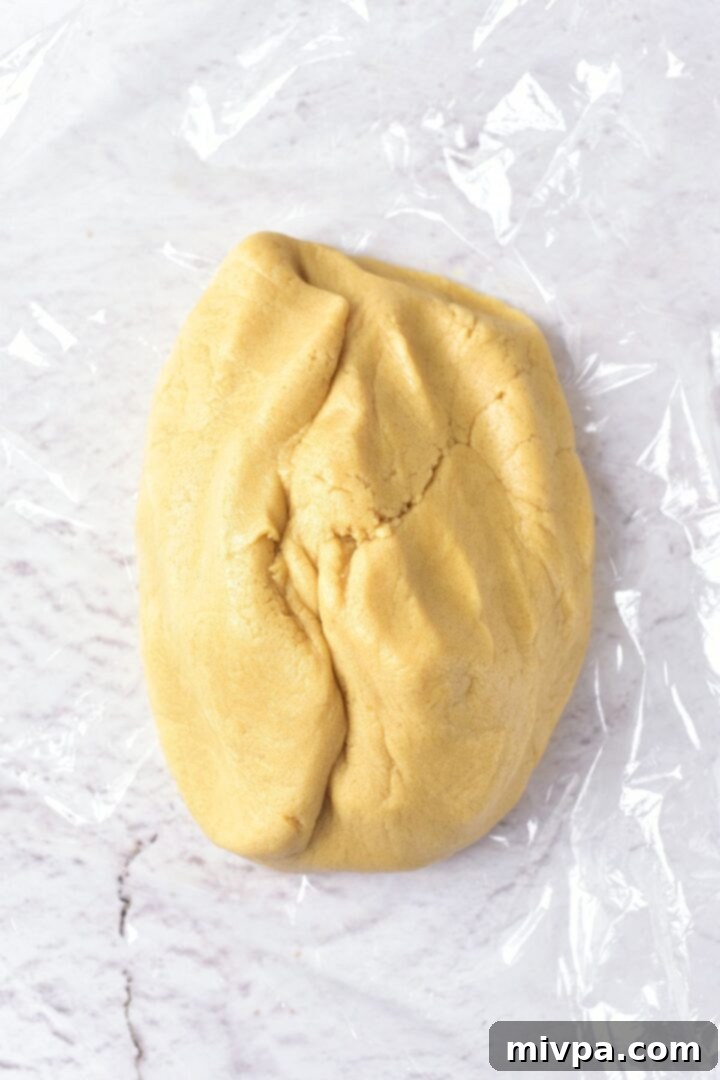
Gather the dough into a cohesive ball or flatten it into a rectangle. Wrap it tightly in cling film or parchment paper and place it in the refrigerator to chill for 30 minutes to an hour. This chilling period is crucial as it helps the gluten-free flours hydrate, prevents the cookies from spreading too much during baking, and makes the dough easier to handle and shape.
5. Preheat Oven and Prepare Baking Sheet
While the dough is chilling, preheat your oven to 370°F (185°C). Line a large baking sheet with parchment paper. This prevents sticking and ensures even baking.
6. Form Dough Balls and Roll in Sugar
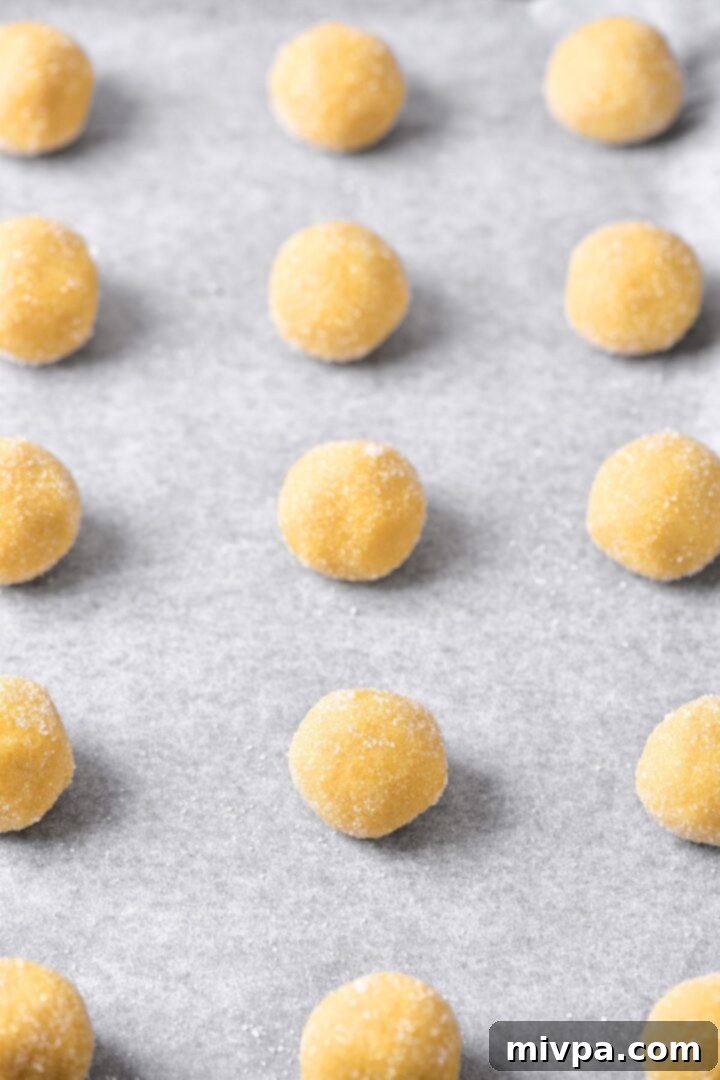
Once the dough is chilled, take small portions (about an inch in diameter) and roll them between your palms to form smooth, uniform balls. Then, roll each dough ball in white sugar, ensuring it’s evenly coated. This sugar coating adds a delightful sparkle and a slightly crispy texture to the finished cookies. Place the sugar-coated dough balls on the lined baking sheet, leaving 1-2 inches of space between each to allow for spreading.
7. Create the Thumbprint and Fill with Jam
Gently press your thumb (or the back of a small measuring spoon) into the middle of each dough ball to create a small cavity. Be careful not to press all the way through. Fill each cavity with approximately 1/2 to 1 teaspoon of your chosen jam. Don’t overfill, as the jam will spread slightly during baking.
8. Bake to Golden Perfection
Transfer the baking sheet to the preheated oven and bake for 12-15 minutes. The cookies are ready when the edges are lightly golden brown and the jam is bubbling gently. They may seem a little soft when you first take them out, but they will firm up significantly as they cool.

9. Cool Completely Before Serving
Once baked, allow the gluten-free thumbprint cookies to cool on the baking sheet for a few minutes before carefully transferring them to a wire rack to cool completely. Cooling is essential for the cookies to fully firm up and for the jam to set.
10. Store for Freshness
Once fully cooled, store these delightful gluten-free jam thumbprint cookies in an airtight container at room temperature. They will remain fresh and delicious for up to 4 days.


Dish by Dish Tips & Tricks for the Best Gluten-Free Thumbprint Cookies:
Achieving bakery-worthy thumbprint cookies is easy with a few insider tips:
- Personalize Your Jam Choice: Don’t limit yourself to one flavor! While strawberry jam is a classic, feel free to use your favorite types of jams or preserves. Consider apricot jam for a tangy twist, plum jam for a rich, deep flavor, mixed berry jam for a burst of fruitiness, or even vibrant blueberry, blackberry, or raspberry jams.
- Explore Other Filling Options: Get creative beyond jam! If you’re looking for an alternative, these cookies also taste fantastic with other fillings. Try a dollop of creamy peanut butter (or other nut/seed butter), a luscious chocolate ganache for a decadent touch, or bright and zesty lemon curd for a tangy contrast.
- Prevent Cracks: To minimize cracking when making the indent, ensure your dough is well-chilled but not overly hard. If the dough is too cold, let it sit at room temperature for a few minutes before shaping. Gently press your thumb or the back of a rounded teaspoon into the center, rolling it slightly to expand the cavity without tearing the edges.
- Watch Baking Time: Gluten-free cookies can sometimes brown faster or slower depending on your oven. Keep an eye on them towards the end of the baking time. They should be just lightly golden at the edges, and the jam should be bubbly. Overbaking can lead to dry cookies.
- Serving Suggestions: These cookies are wonderful on their own or paired with a hot beverage. They also make excellent additions to holiday dessert platters, afternoon tea spreads, or as a thoughtful homemade gift.
- Storing for Freshness: Once completely cooled, store your gluten-free thumbprint cookies in an airtight container at room temperature for up to 4 days to maintain their softness and flavor. For longer storage, see the freezing tips below.
Storage and Freezing Instructions:
To keep your gluten-free thumbprint cookies fresh or prepare them ahead of time, here are the best storage methods:
- Room Temperature: Store cooled cookies in an airtight container at room temperature for up to 4 days. Layer them with parchment paper if stacking to prevent sticking, especially if the jam is particularly sticky.
- Freezing Baked Cookies: Once the cookies are completely cooled, arrange them in a single layer on a baking sheet and freeze until solid. Then transfer them to a freezer-safe airtight container or bag, separating layers with parchment paper. They can be frozen for up to 2-3 months. Thaw at room temperature before serving.
- Freezing Dough: You can also freeze the raw cookie dough. Form the dough into balls, roll in sugar, and make the thumbprints (but don’t add the jam yet). Freeze the dough balls on a baking sheet until solid, then transfer to a freezer-safe bag. When ready to bake, place frozen dough balls on a prepared baking sheet, make the indent, fill with jam, and bake as directed, adding a few extra minutes to the baking time if needed.
Frequently Asked Questions (FAQ):
- Can I make these cookies vegan? Yes! Since this recipe is already dairy-free, you would only need to replace the egg with a flax egg (1 tablespoon ground flaxseed meal mixed with 3 tablespoons water, let sit for 5 minutes) or another egg substitute suitable for baking. Note that texture might vary slightly.
- Why did my cookies spread too much? Over-softened butter, insufficient chilling time, or too little flour can cause excessive spreading. Ensure your butter is just softened (not melted) and don’t skip the chilling step.
- My jam ran out, what happened? This usually happens if the indent isn’t deep enough, or if the jam is too thin. Use a thicker jam or consider reducing very liquidy jams slightly on the stovetop before filling.
- Can I use a different flour blend? While a 1:1 gluten-free measure-for-measure blend is recommended for consistency, other blends might work. However, the exact ratio of liquid to dry ingredients might need adjustment, and results can vary.
More Gluten-Free Cookies You’ll Love:
If you’re a fan of these delightful thumbprint cookies, be sure to explore more of our gluten-free cookie recipes:
- Almond Flour Thumbprint Cookies (Gluten-Free, Dairy-Free) – A nuttier take on the classic!
- Snowball Cookies (Gluten-Free, Dairy-Free) – Melt-in-your-mouth festive treats.
- Chocolate Crinkle Cookies (Gluten-Free, Dairy-Free) – Rich, fudgy, and beautiful.
- Chewy Molasses Cookies (Gluten-Free, Dairy-Free) – Spiced perfection for cooler months.
- Gingerbread Cookies (Gluten-Free, Dairy-Free) – A holiday favorite that’s easy to make!

Delightful Gluten-Free Desserts You’ll Adore:
Beyond cookies, our kitchen is full of incredible gluten-free dessert ideas. Here are some more sweet treats to satisfy your cravings:
- Gluten-Free Pumpkin Banana Muffins (Dairy-Free)
- 126 Gluten-Free Desserts and Sweet Treats for Labor Day
- Mini Pumpkin Cheesecakes (Gluten-Free, Dairy-Free Option)
- Gluten-Free Pecan Pie Bars (Dairy-Free)
P.S. If you try this recipe, I’d love for you to leave a star rating below, and/or a review in the comment section further down the page. I always appreciate your feedback. Be sure to check out my entire Recipe Index for all the recipes on the blog. You can also follow me on Pinterest, Facebook or Instagram! Sign up for my Email List to get fresh recipes in your inbox each week!
Print

Easy Gluten-Free Thumbprint Cookies (Dairy-Free)
5 Stars
4 Stars
3 Stars
2 Stars
1 Star
5 from 1 review
Author: Felicia Lim
Total Time: 55 minutes
Yield: 16 cookies
Diet: Gluten Free
Description
These gluten-free thumbprint cookies are made with a sugar cookie dough that’s rolled in sugar, then pressed and filled with delicious, sweet jam. Plus, they’re dairy-free too! Go bake a batch of cookies today and enjoy them with a steeping mug of tea!
Ingredients
Units
Scale
- 1 cup unsalted dairy-free butter, softened
- 1/2 cup white sugar + more for rolling dough
- 1/2 cup light brown sugar
- 1 egg, beaten
- 1 tablespoon vanilla extract
- 2 cups gluten-free measure-for-measure flour
- 1/2 teaspoon xanthan gum (omit if your gluten-free flour blend already includes it)
- 1/2 teaspoon salt
- 6 tablespoons strawberry jam
Instructions
- Beat Butter and Sugar: Beat the butter and both brown sugar and white sugar in a bowl until fluffy (approximately 3-4 minutes with a mixer).
- Add Egg and Vanilla: Add the egg and vanilla extract, then beat again to combine.
- Add Gluten-Free Flour, Xanthan Gum, and Salt: In another bowl, whisk the gluten-free measure-for-measure flour, xanthan gum (if using), and salt together. Add half the flour mixture, beat and gradually add the remaining flour mixture until you get a pliable dough that is not too wet or dry.
- Chill Dough: Gather the dough into a ball or rectangle, wrap in cling film and chill the dough in the refrigerator for 30 minutes to an hour.
- Preheat and Line: Preheat the oven to 370F, then line a large baking sheet with parchment paper.
- Form Dough Balls and Roll in Sugar: Form dough into balls about an inch in diameter, then roll the balls of dough in white sugar. Place the dough balls on the prepared baking sheet 1-2 inches apart.
- Press Thumb into Dough: Press your thumb into the middle of each ball of dough to make a small cavity and fill it with jam.
- Bake Until Ready: Bake for 12-15 minutes. The cookies will be a little soft at first, then firm up as they cool.
- Cool Completely before Serving: Let the gluten-free thumbprint cookies cool on a wire rack before serving and enjoying.
- Store: Store these gluten-free jam thumbprint cookies in an airtight container.
Notes
Butter: I used unsalted dairy-free butter to keep this recipe dairy-free. However, if you are not lactose-intolerant, go ahead and use regular unsalted butter instead.
White Sugar: I used white sugar, but cane sugar will work too.
Brown Sugar: I used light brown sugar, but dark brown sugar or coconut sugar will work too.
Egg: The egg acts as a binder for the ingredients, so make sure to add it in.
Vanilla Extract: I like adding a bit of vanilla extract for extra flavor, and I highly recommend adding it in.
Gluten-Free Flour: I recommend using a good-quality gluten-free measure-for-measure flour (a gluten-free 1:1 substitute for regular all-purpose flour) that is made up of lighter flours/starches (such as rice flour, tapioca starch, corn starch or potato starch). I do NOT recommend using a gluten-free flour blend that is made up of heavier flours (such as garbanzo bean flour).
Xanthan Gum: Xanthan gum is the replacement for gluten in gluten-free flours and helps to bind the ingredients together. If your gluten-free flour blend does not already include xanthan gum, make sure to add it in.
Jam: I used strawberry jam, but feel free to use other types of jams (such as apricot jam, plum jam, mixed berry jam, blackberry jam or raspberry jam).
Storing: To store, place the cooled gluten-free thumbprint cookies in an airtight container and store at room temperature for up to 4 days.
- Prep Time: 10 mins
- Chilling Time: 30 mins
- Cook Time: 15 mins
- Category: Cookies
- Method: Baking
- Cuisine: American
