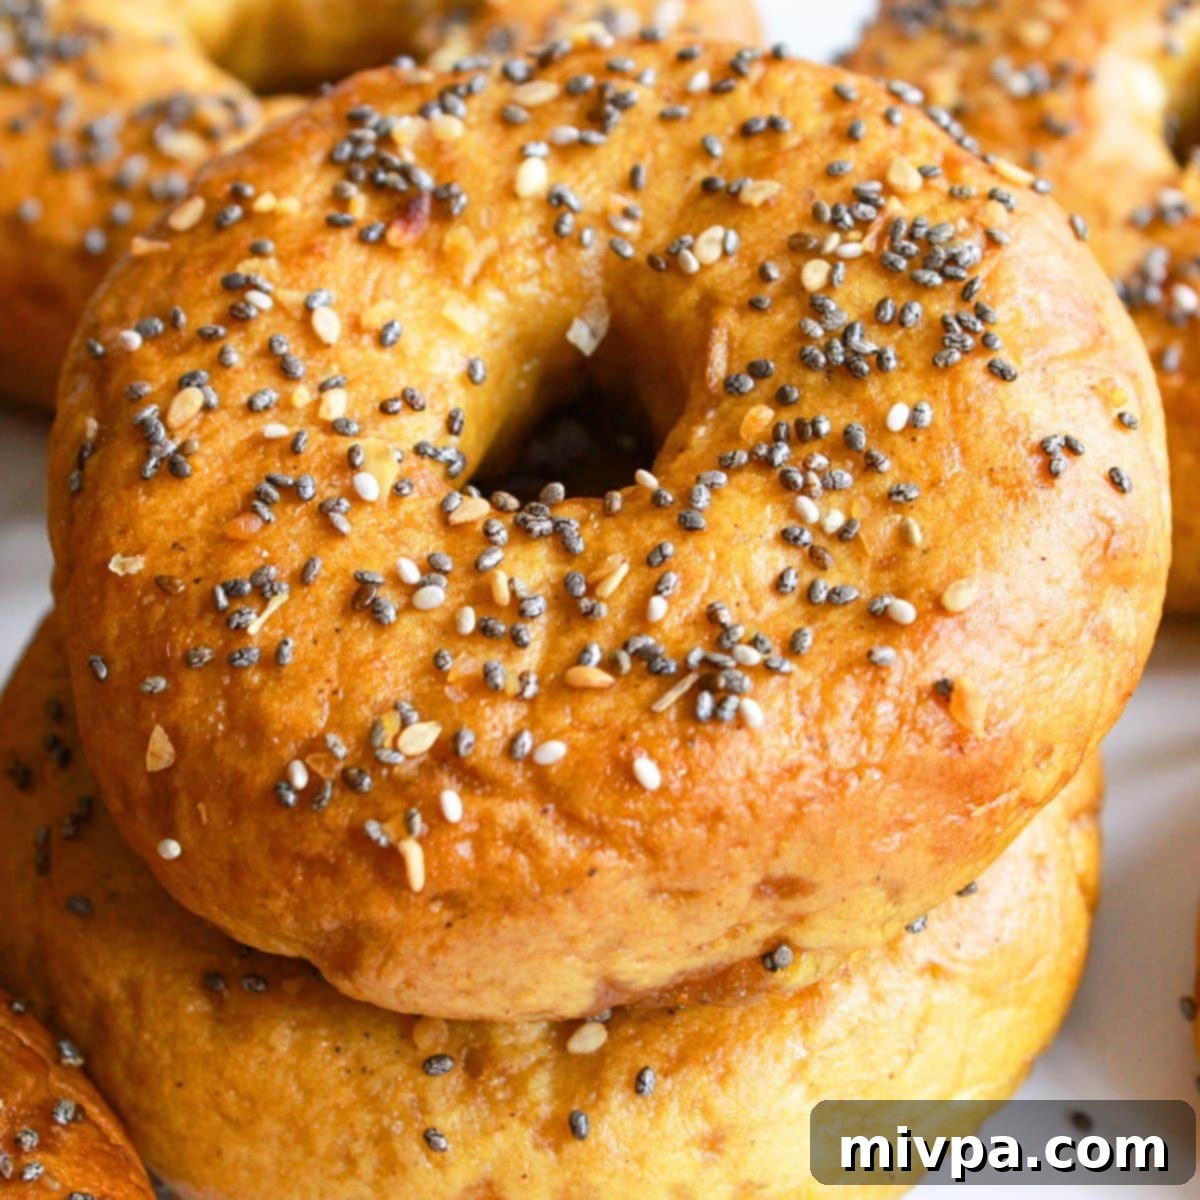
Ultimate Chewy Gluten-Free Vegan Bagels: Your Homemade Everything Bagel Recipe
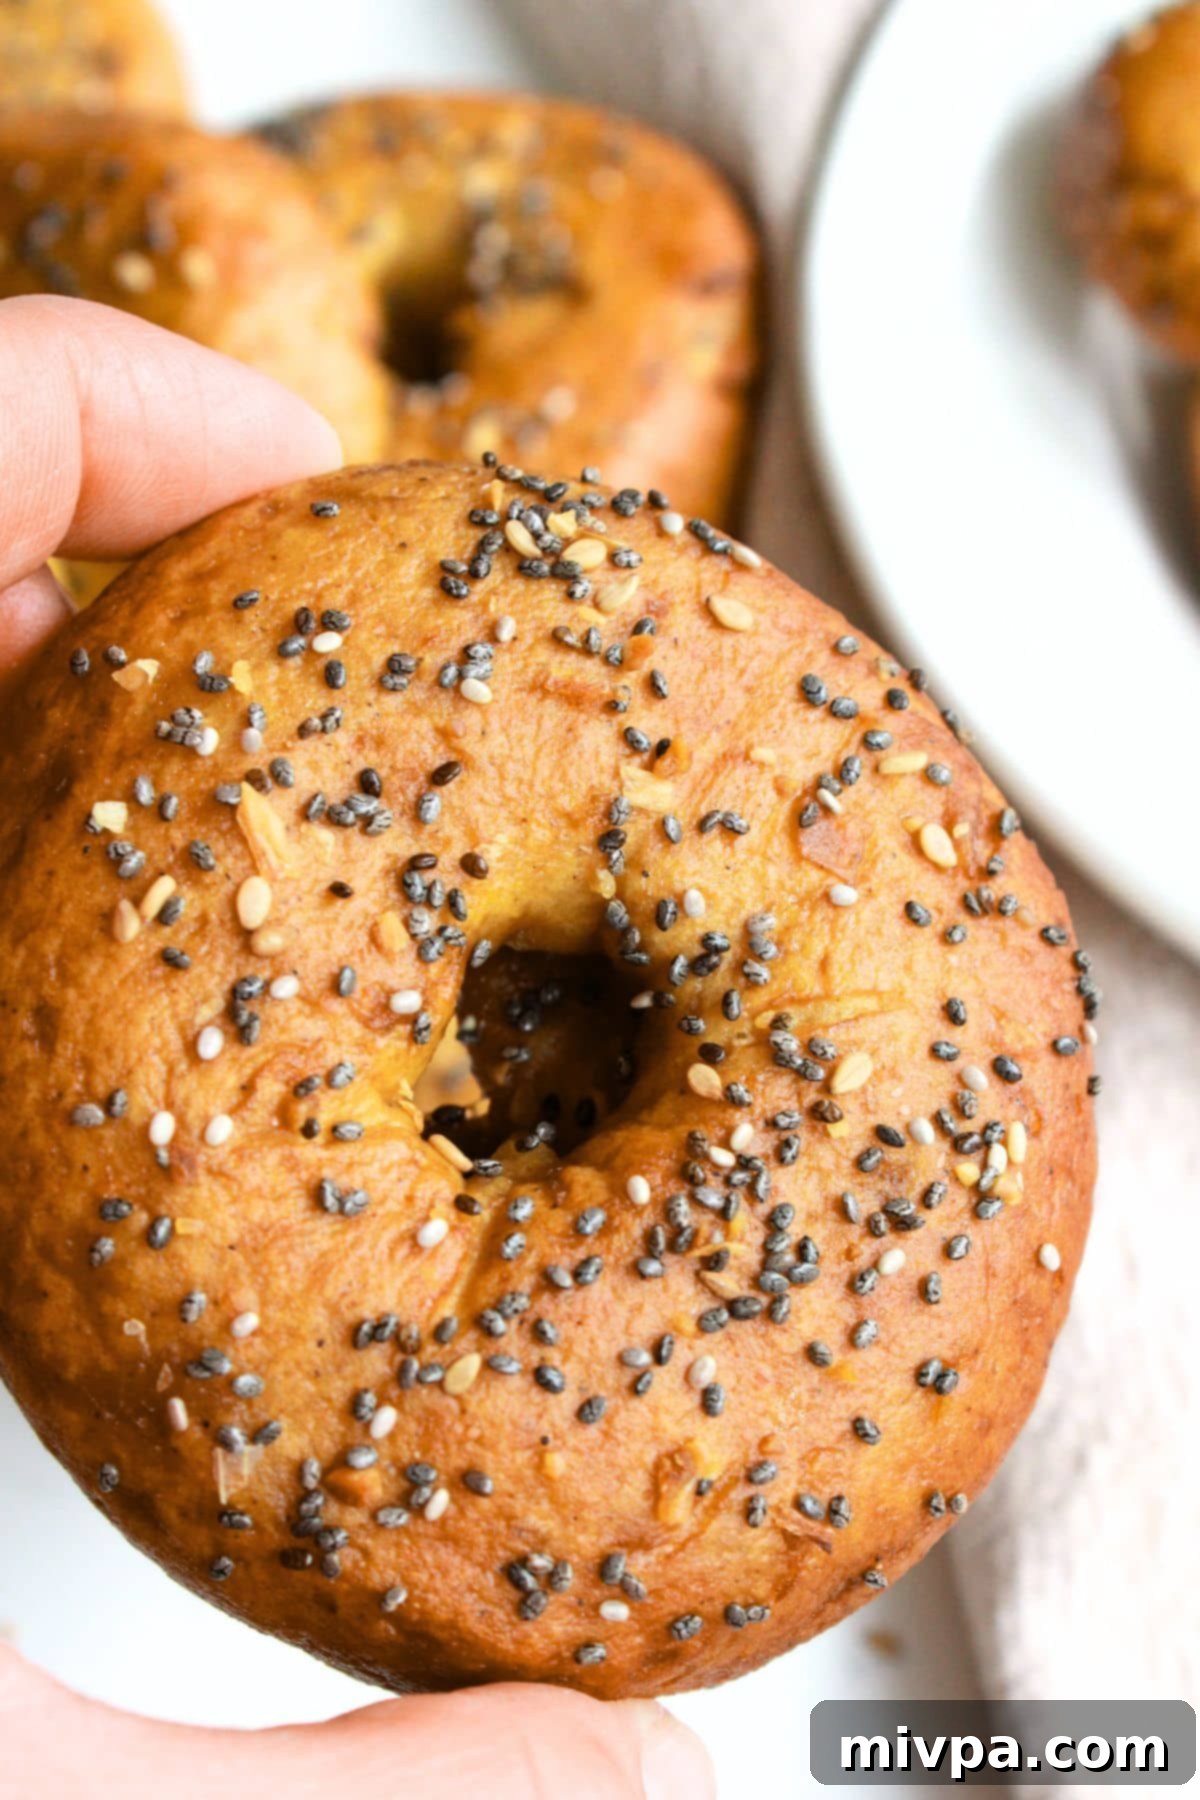
Imagine biting into a perfectly golden-brown bagel, with a delightfully chewy interior and a hint of a crispy crust, generously coated with savory everything bagel seasoning. Now imagine that bagel is also completely gluten-free, dairy-free, and vegan. That’s exactly what you’ll get with this incredible homemade recipe! No eggs, no dairy, no gluten – just pure bagel bliss. Get ready to bake a batch and savor the taste of a classic, made accessible for everyone.
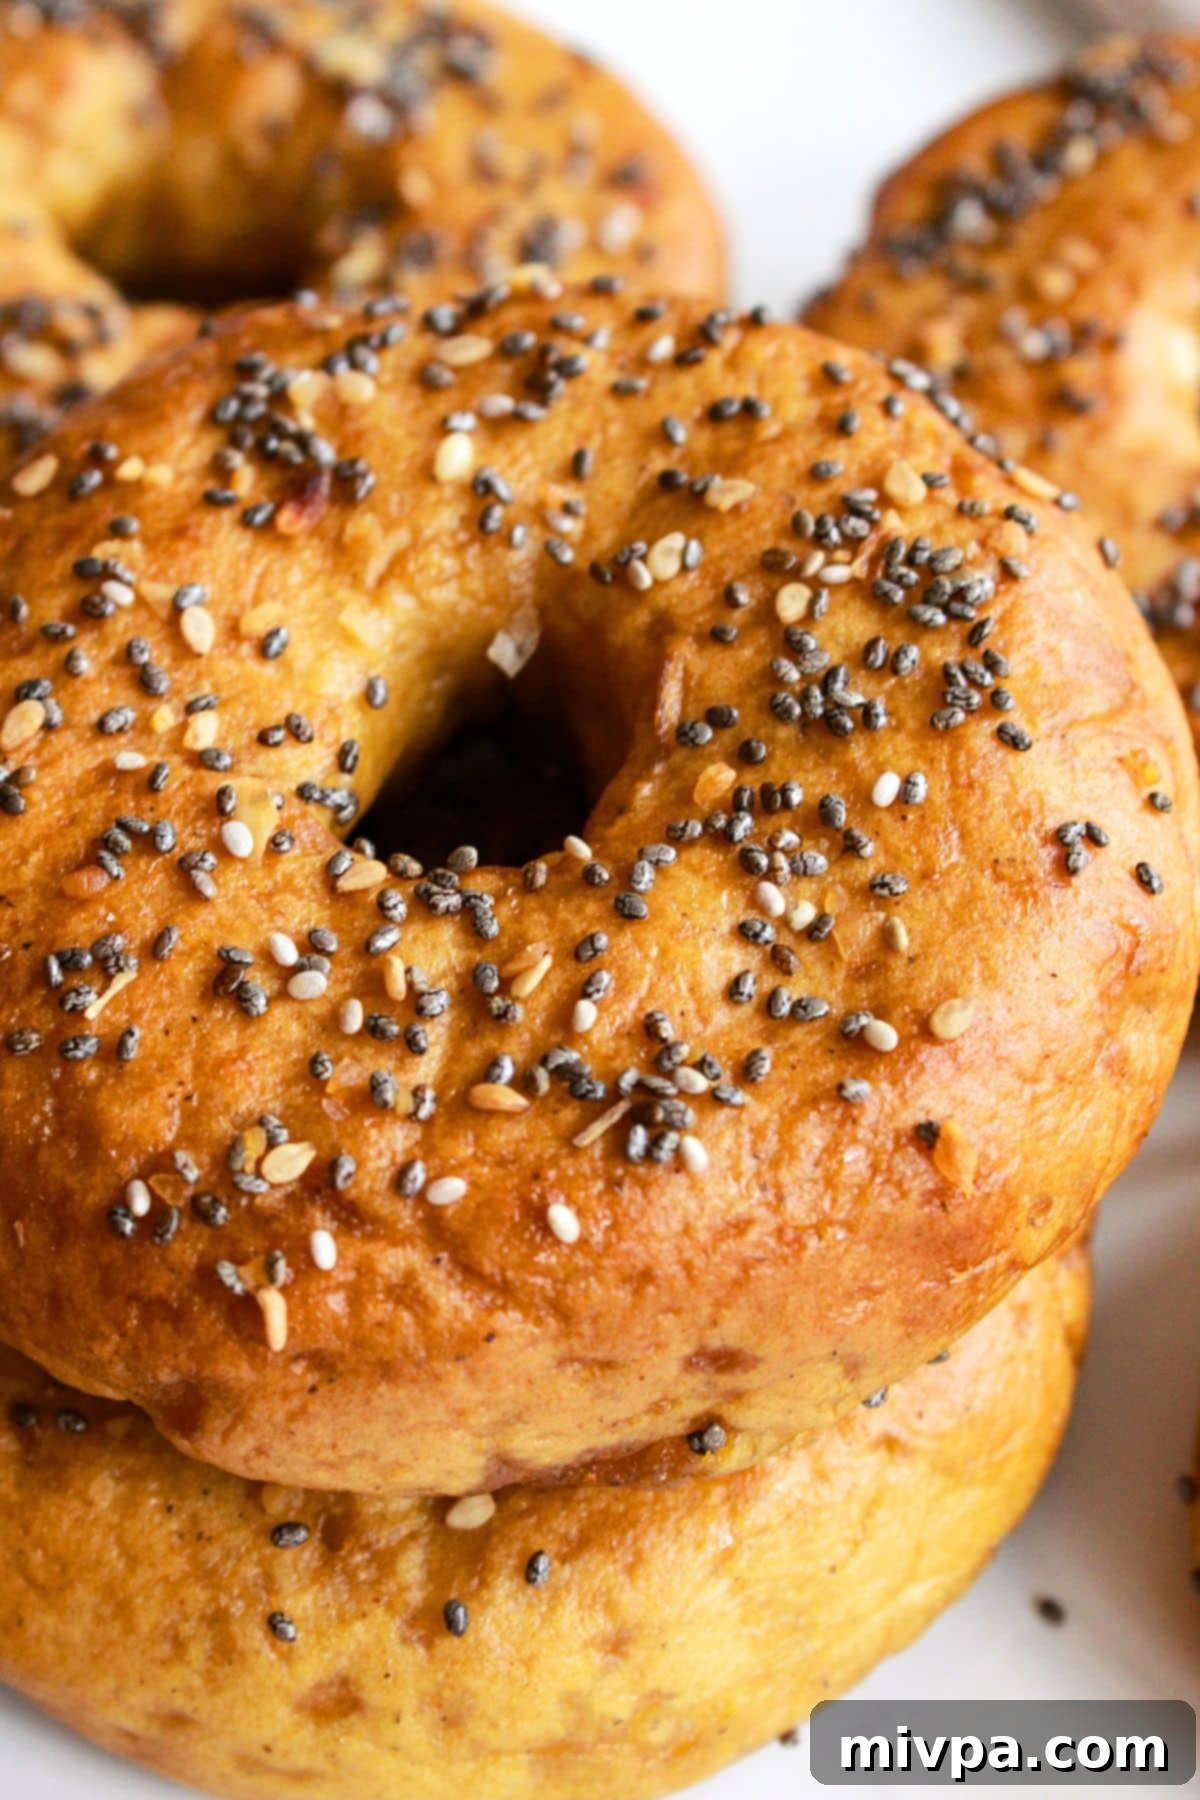
Crafting Amazing Vegan and Gluten-Free Bagels at Home
My journey into the world of bagels truly began when Juan and I lived in New York City. The aroma of freshly baked bagels from the local bagel shop was irresistible, and I quickly became a devoted fan, especially of the everything bagel. That delightful combination of dried onion, garlic, sesame seeds, and poppy seeds sprinkled over a perfectly chewy bagel was nothing short of divine. Whether it was a spontaneous purchase from a neighborhood store or a grab-and-go bag from Trader Joe’s, bagels were a staple.
For fellow bagel enthusiasts who, like me, adore this iconic baked good but navigate a gluten-free lifestyle, the quest for a truly satisfying alternative can be challenging. Many gluten-free options fall short of that authentic chewy texture and crispy exterior. But fear not, because I’ve spent countless hours perfecting a recipe that brings the joy of homemade bagels right to your kitchen, completely gluten-free and vegan!
While I’ve experimented with no-boil gluten-free bagels in the past, this particular recipe embraces the traditional method of a baking soda bath. This extra step, though seemingly small, is absolutely crucial and entirely worth the effort. It’s the secret to achieving that characteristic shiny, golden-brown crust and deep, rich flavor that we all associate with a truly great bagel. Prepare to transform your baking skills and indulge in a batch of these extraordinary plant-based bagels today!
Why You’ll Fall in Love with This Gluten-Free Vegan Bagel Recipe
This recipe isn’t just about baking bagels; it’s about reclaiming the joy of a beloved classic, made perfectly suitable for various dietary needs without sacrificing flavor or texture. Here’s why these homemade bagels will quickly become a favorite:
- Accessible Ingredients: You won’t need to hunt for obscure or expensive items. The main ingredients required for these gluten-free and vegan bagels are readily available at most local grocery stores. We focus on common pantry staples, making this recipe approachable for every home baker.
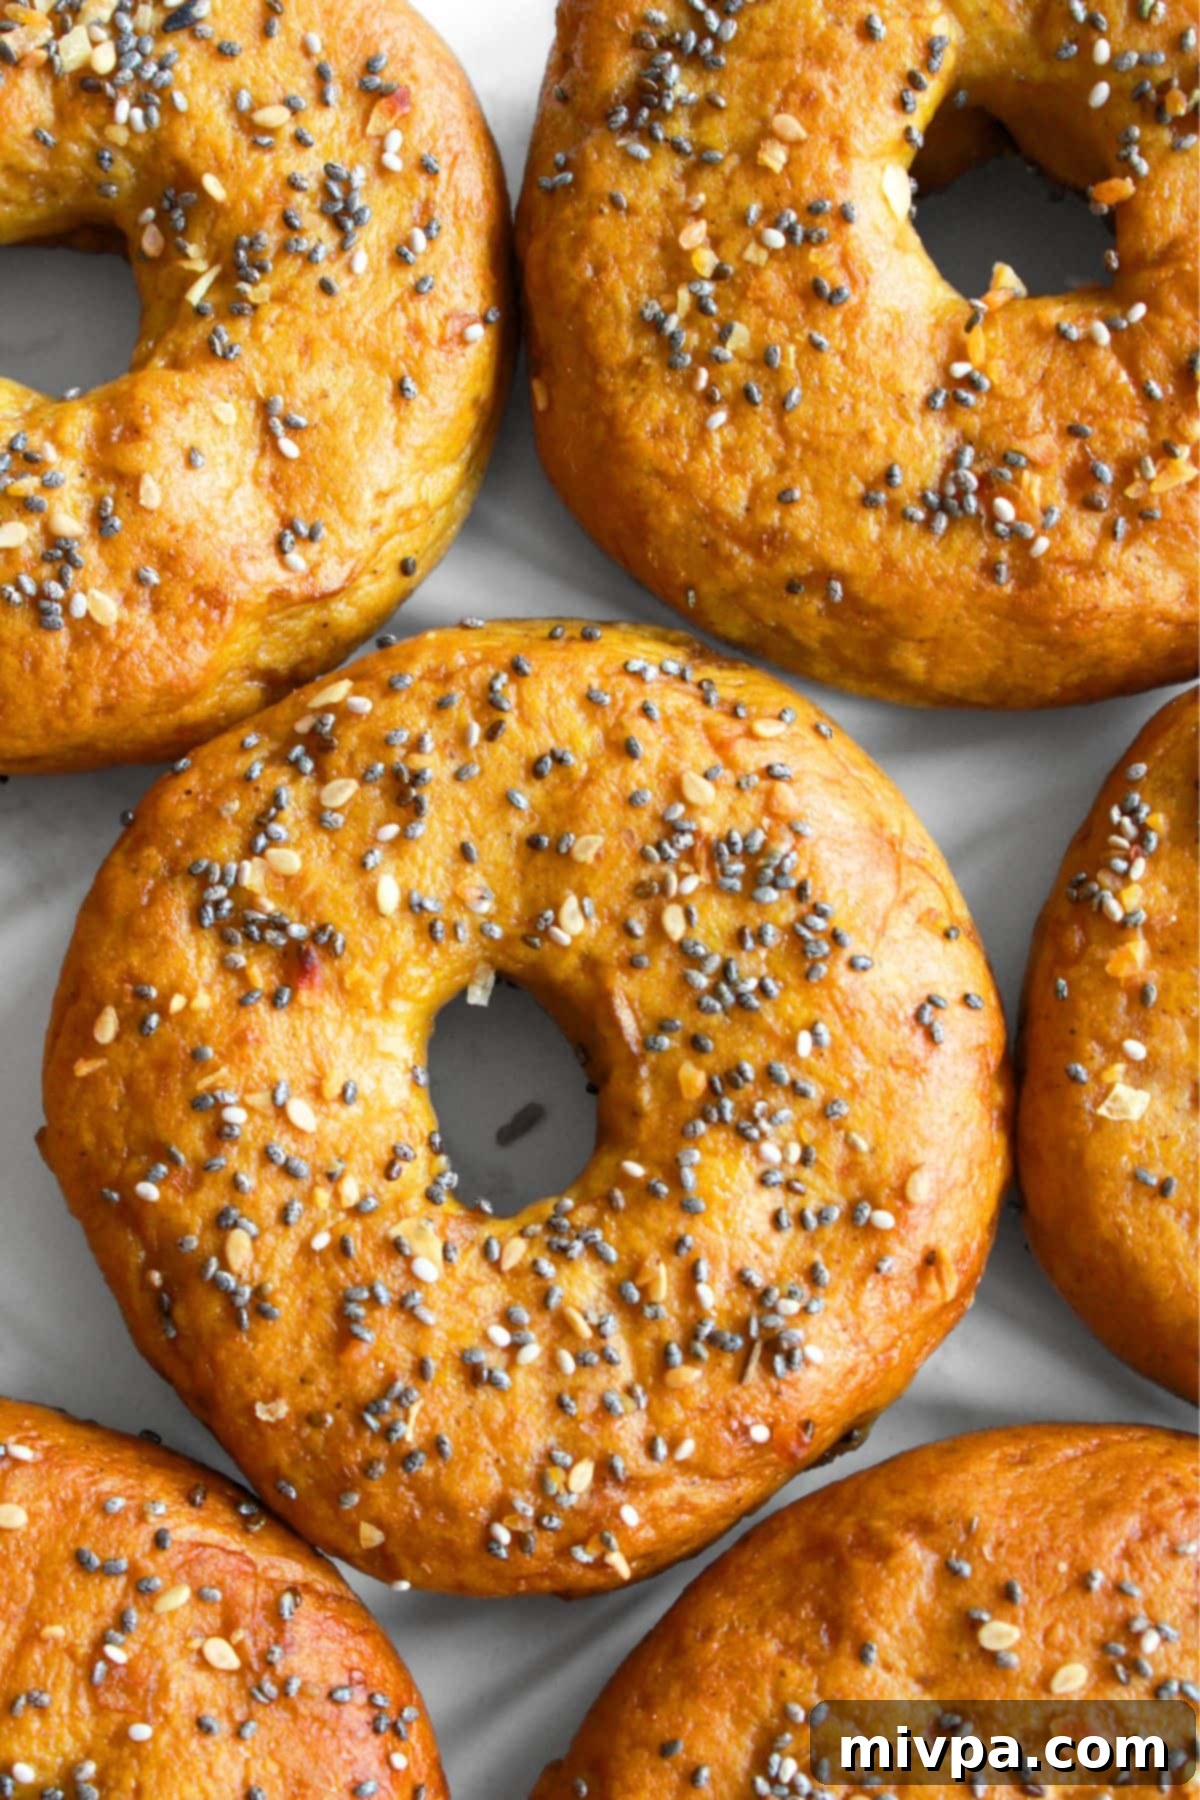
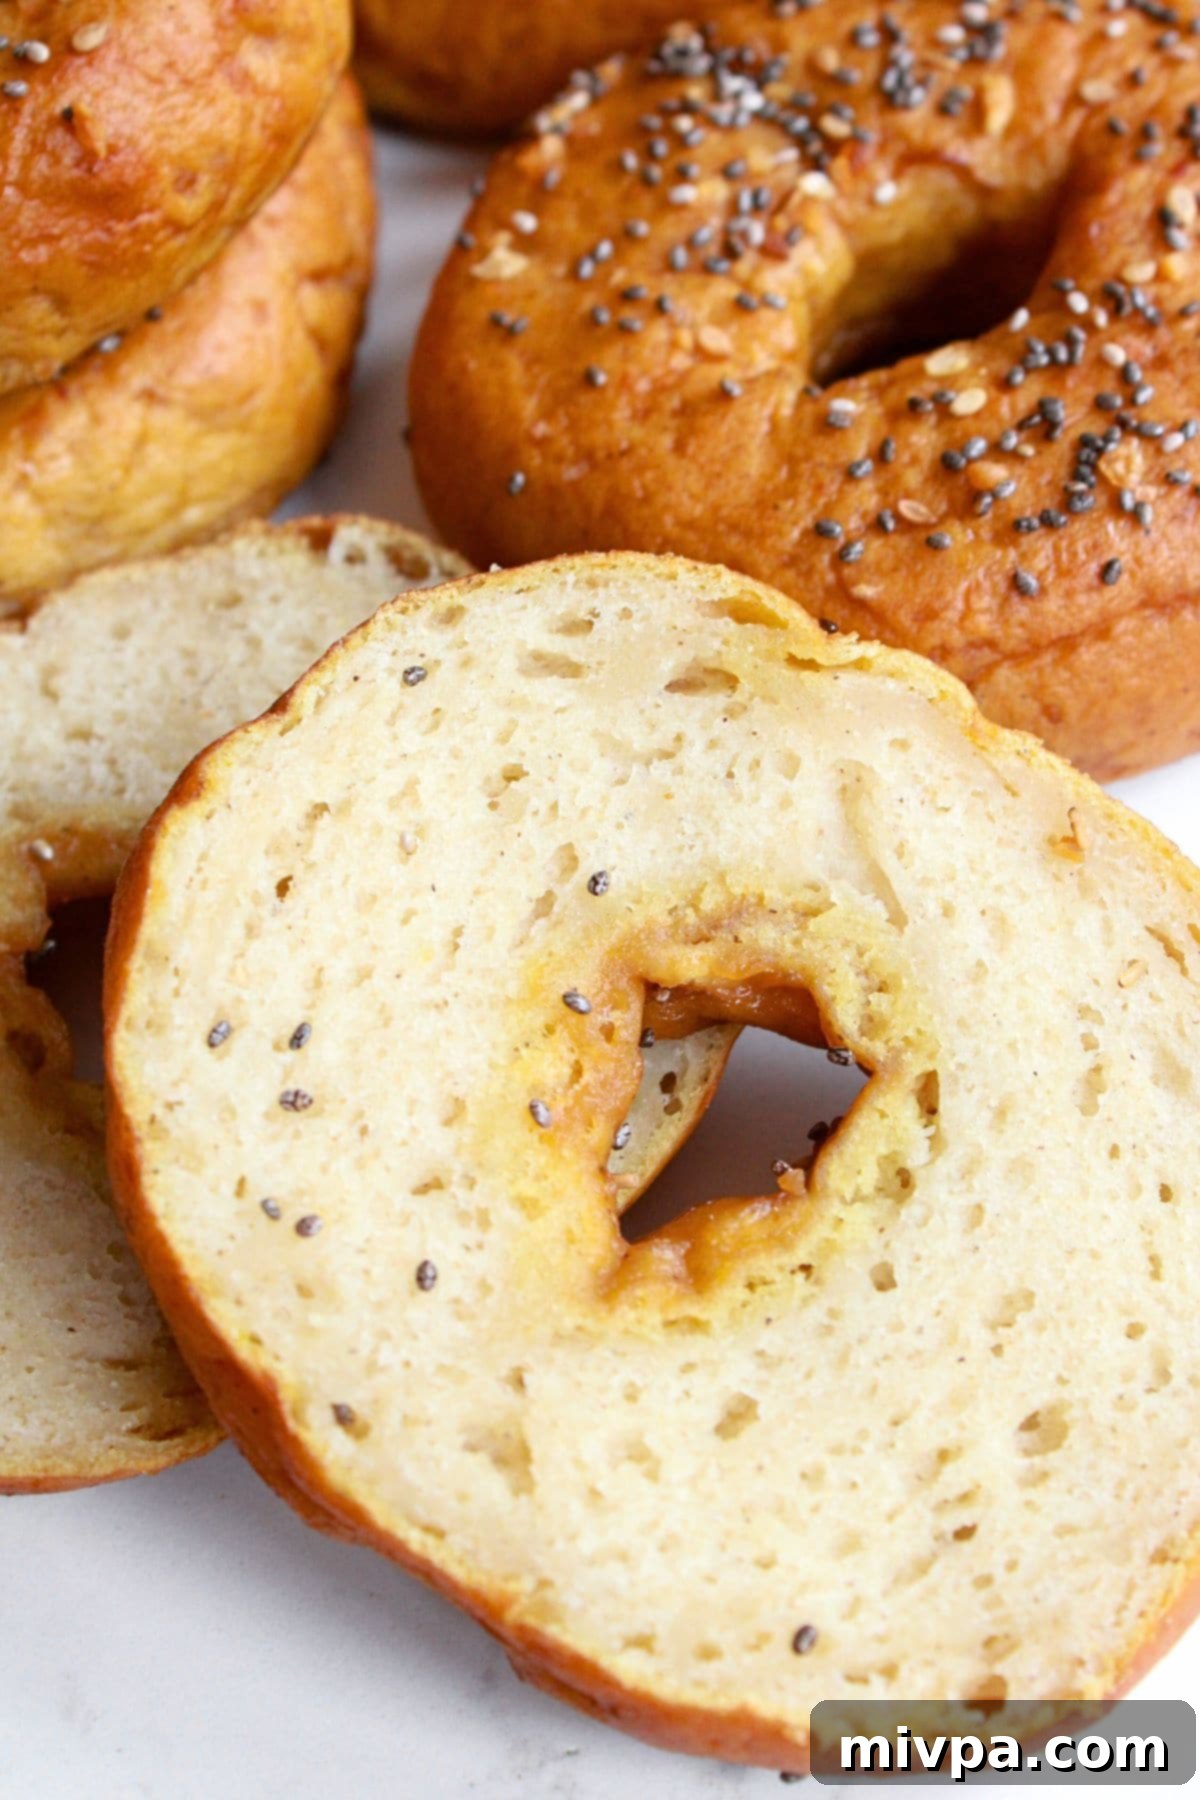
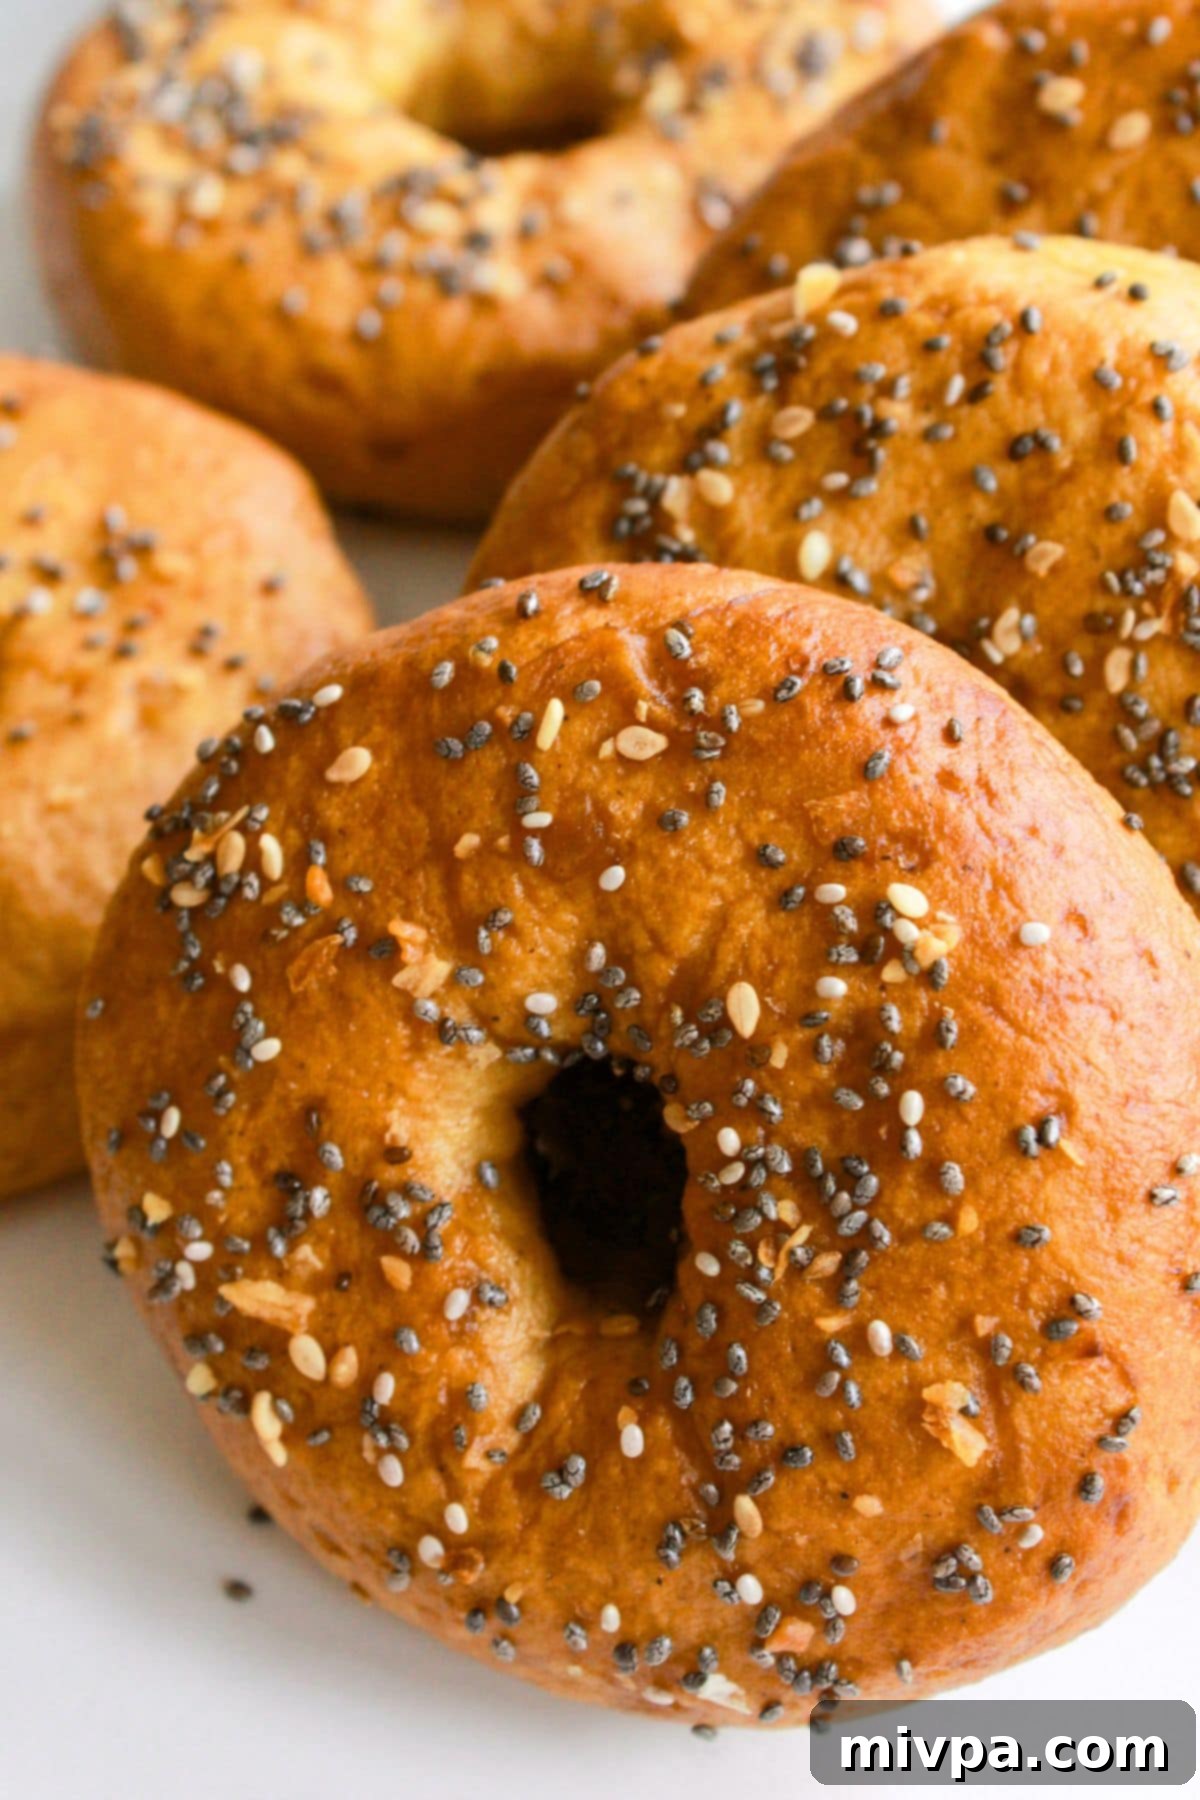
- Unbeatable Texture: Thanks to the essential baking soda bath, these bagels boast a uniquely crispy, shiny, and beautifully golden-brown exterior. This perfectly complements their interior, which is wonderfully chewy and satisfyingly doughy – exactly what you expect from a great bagel. Slice them, toast them, and pile on your favorite toppings for an experience that truly mimics traditional bagels.
- Completely Dietary-Friendly: Perhaps the most significant advantage is that these delicious bagels are 100% gluten-free, dairy-free, and vegan. This means they are an ideal choice for individuals with Celiac disease, gluten or lactose intolerances, or those who simply choose to follow a gluten-free or plant-based diet. Everyone deserves to enjoy a fantastic bagel without worry or compromise!
- Homemade Freshness: There’s nothing quite like the taste and aroma of freshly baked goods. Making bagels from scratch allows you to enjoy them at their peak, ensuring maximum flavor and the perfect texture that store-bought options simply can’t match.
- Customizable Flavors: While the everything bagel seasoning is a fan-favorite for a reason, this base recipe is incredibly versatile. You can easily adapt it to create plain bagels, sesame bagels, poppy seed bagels, or even savory options like garlic or onion bagels, catering to every preference.
Essential Ingredients for Your Gluten-Free Vegan Bagels
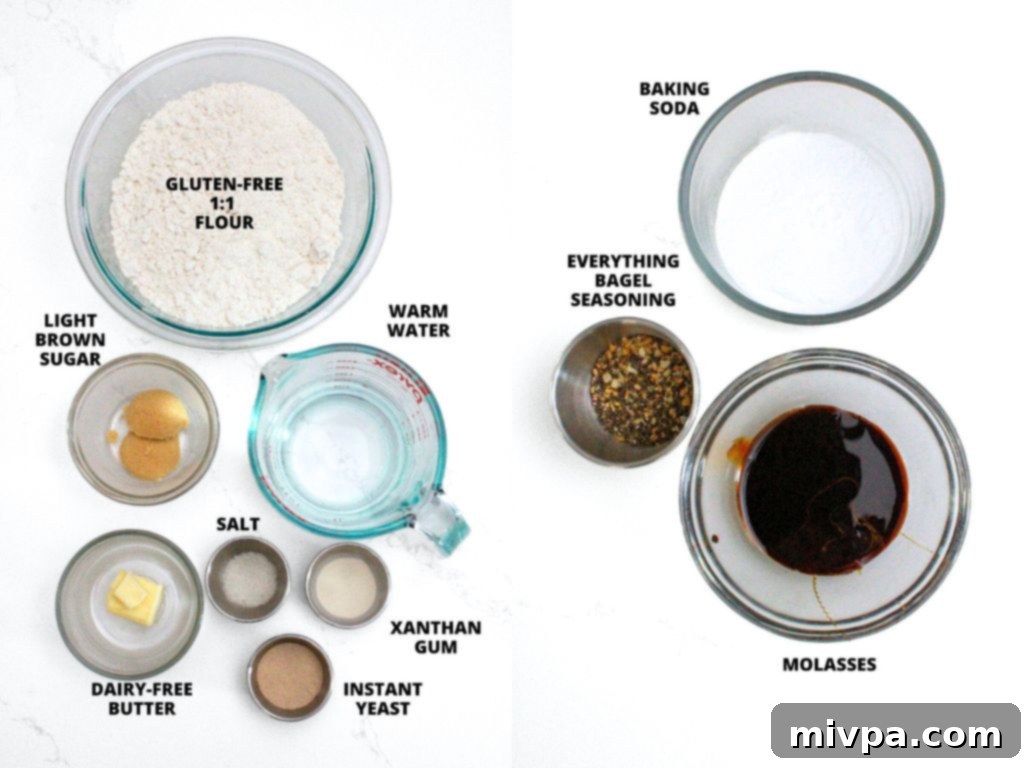
Gathering your ingredients is the first exciting step in making these incredible bagels. Below is a visual overview to help you see everything you’ll need. Remember, using fresh and good-quality ingredients will always yield the best results!
(For precise measurements and detailed instructions, please refer to the printable recipe card conveniently located at the bottom of this post.)
Recipe Notes & Expert Substitutions for Perfect Bagels
Achieving the perfect gluten-free and vegan bagel requires attention to a few key details and understanding the role of each ingredient. Here are some essential notes and potential substitutions to guide you:
- Gluten-Free Flour Blend: The type of gluten-free flour blend you choose is paramount. I highly recommend using a high-quality gluten-free 1:1 all-purpose flour blend that predominantly features lighter flours and starches, such as rice flour, tapioca starch, corn starch, or potato starch. These lighter components contribute to a more tender, fluffier crumb. It is crucial to AVOID blends made with heavier flours like garbanzo bean flour or other bean flours, as these will result in a denser, often gummy, and less desirable texture for your bagels.
- Xanthan Gum: This ingredient is a powerhouse in gluten-free baking, acting as a crucial binder to replace the elasticity and structure that gluten provides. Even if your chosen gluten-free flour blend already contains xanthan gum, I strongly advise adding the specified amount in the recipe. This additional xanthan gum is essential for giving the dough the necessary elasticity and chewiness, preventing a crumbly texture. If you have an allergy to xanthan gum, an equal amount of psyllium husk powder can be used as an effective alternative.
- Sugar: While I opted for light brown sugar in this recipe, granulated white sugar or cane sugar will work just as effectively. The primary role of sugar here is not just for sweetness (though it does add a subtle depth of flavor); it acts as vital “food” for the yeast. This nourishment allows the yeast to activate properly, producing the necessary carbon dioxide gases that make the dough rise, contributing to the bagel’s airy yet chewy texture.
- Instant Yeast: My preference for instant dry yeast stems from its convenience. Unlike active dry yeast, instant yeast doesn’t require pre-activation in warm water (proofing), saving you a step and a bit of time. You can simply mix it directly with your other dry ingredients, streamlining the dough preparation process.
- Warm Water: The temperature of your warm water is a critical factor for successful yeast activation. Aim for a temperature range between 105°F to 115°F (40°C to 46°C). Water that is too cold will fail to activate the yeast, leaving your dough flat. Conversely, water that is too hot will kill the yeast, preventing any rise whatsoever. Using a kitchen thermometer can help you hit that sweet spot.
- Dairy-Free Butter: To ensure this recipe remains completely vegan and dairy-free, I’ve used dairy-free butter (also known as vegan butter). If you do not have lactose intolerance or are not adhering to a vegan diet, feel free to substitute with regular unsalted butter in the same quantity.
- Baking Soda: This unassuming ingredient is absolutely essential for the baking soda bath. When the bagels are briefly boiled in this alkaline solution, the baking soda initiates a chemical reaction on the surface of the dough. This reaction creates the characteristic glossy, deep golden-brown crust and contributes significantly to the unique chewy texture that is synonymous with authentic bagels.
- Molasses: Just as important as the baking soda in the bath, molasses adds to the rich color and subtly sweet, malty flavor of the bagels. It aids in achieving that beautiful deep brown hue during baking. If you are strictly vegan, be sure to use vegan-certified molasses, as some types may not be processed in a vegan-friendly manner.
- Everything Bagel Seasoning: This blend is a personal favorite for its incredibly flavorful and aromatic profile. The mix of dried garlic, onion flakes, sesame seeds (black and white), and poppy seeds provides a delightful crunch and savory kick. While I highly recommend everything bagel seasoning, feel free to get creative with other toppings or leave your bagels plain.
Step-by-Step Guide: How to Make Chewy Gluten-Free Vegan Bagels
Prepare Your Bagel Dough:
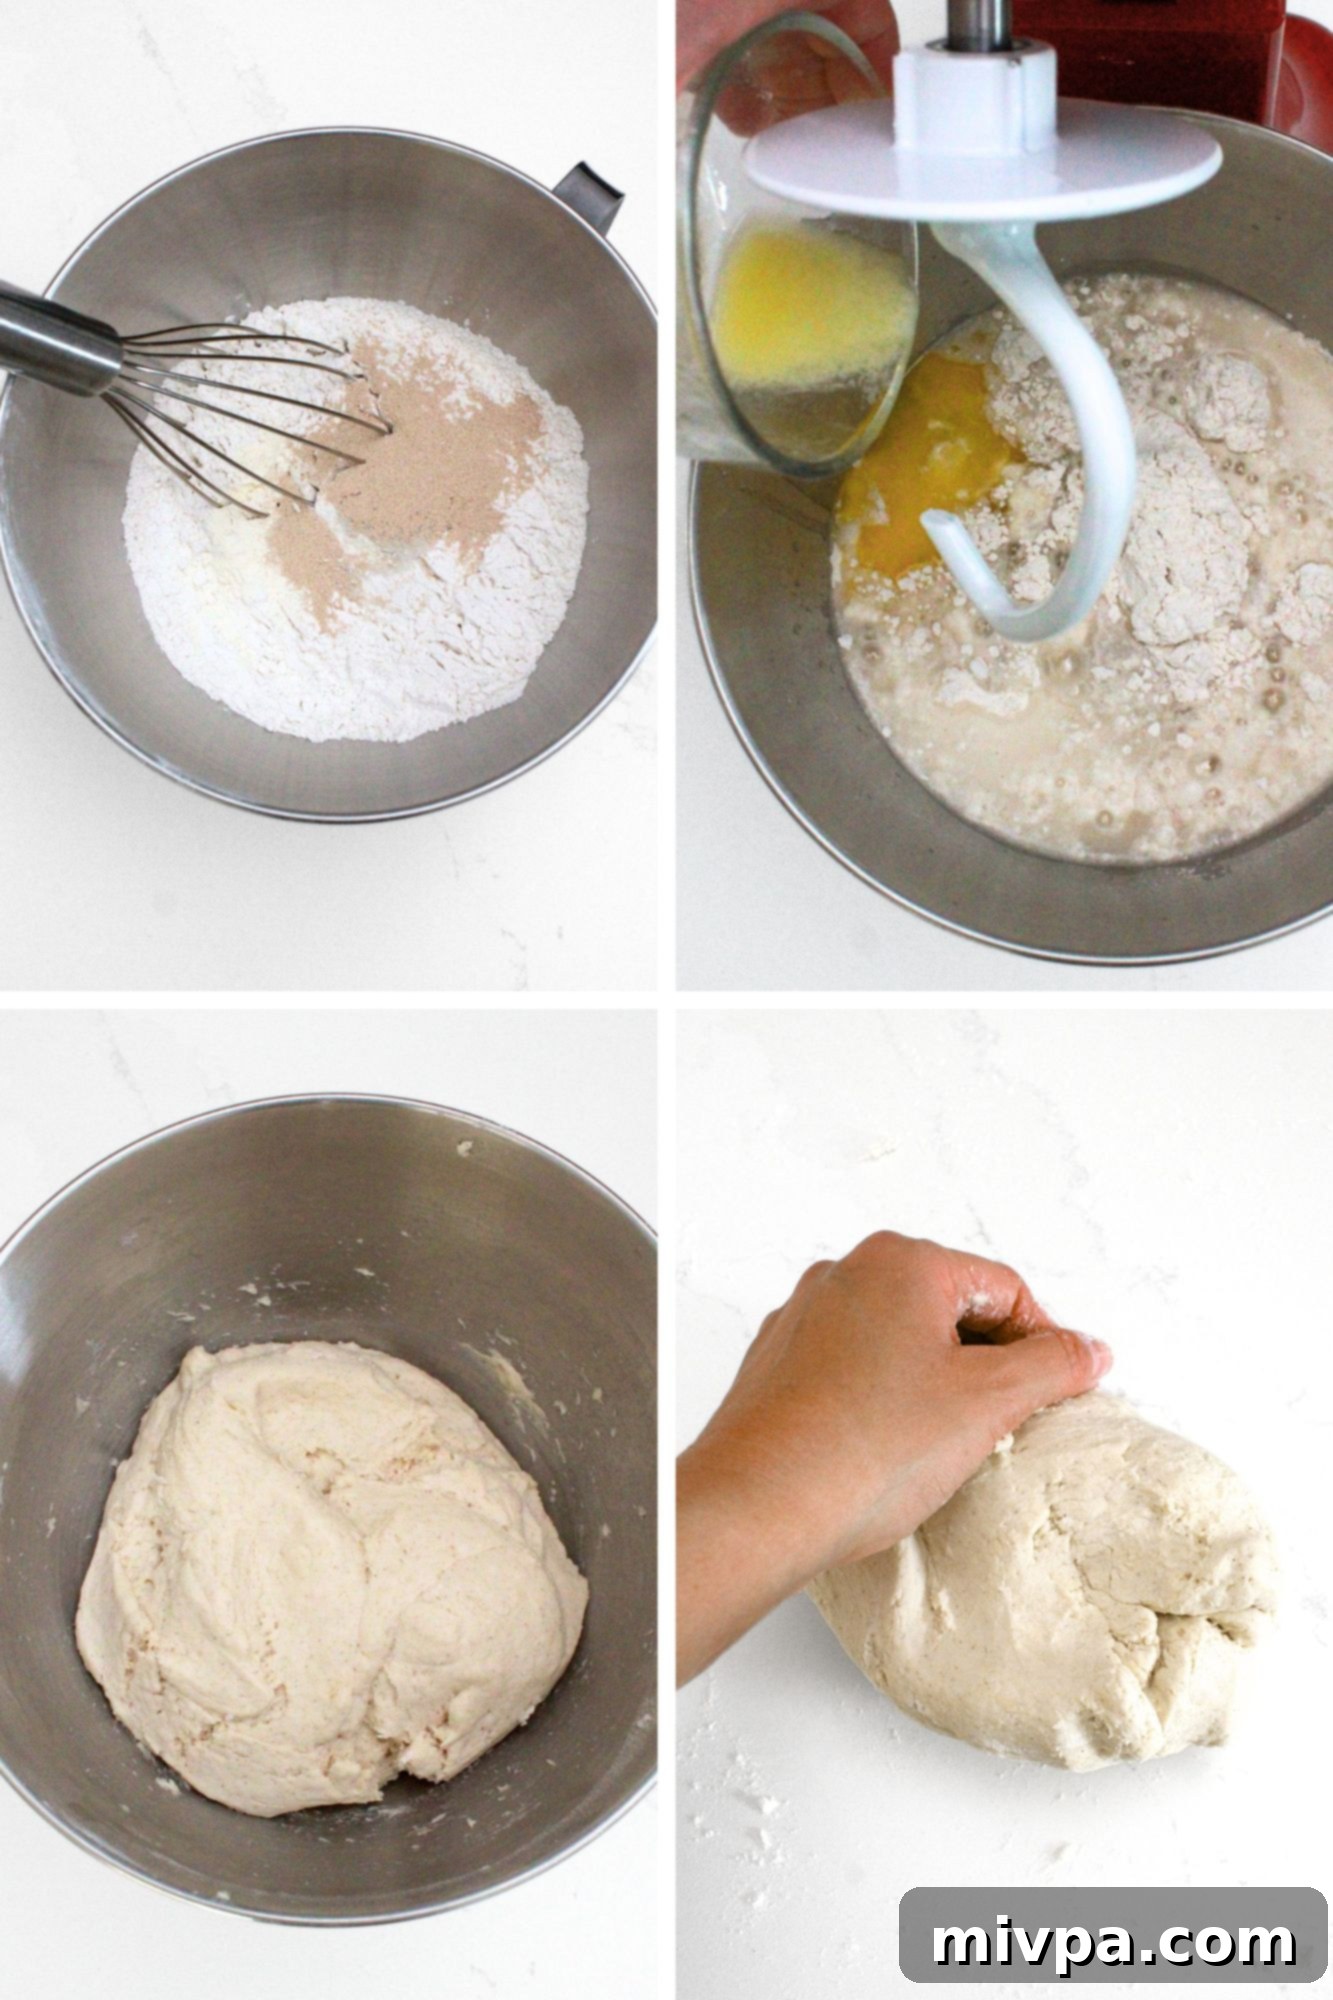
1. Whisk Dry Ingredients: In the large bowl of your stand mixer, combine the gluten-free 1:1 flour blend, additional xanthan gum, salt, instant dry yeast, and light brown sugar. Whisk these dry ingredients together thoroughly to ensure they are evenly distributed, which is crucial for uniform leavening.
2. Add Melted Butter & Knead: Pour the melted dairy-free butter into the dry mixture. Using the dough hook attachment on your stand mixer, begin mixing on a low speed until the butter is fully incorporated into the dry ingredients. Once combined, increase the speed to medium and continue kneading the dough for a full 5 minutes. This kneading time is important for developing the dough’s structure and elasticity, even without gluten.
3. First Dough Rise (Bulk Fermentation): Once kneaded, cover the mixer bowl tightly with plastic wrap. Place the bowl in a warm, draft-free area of your kitchen. Allow the dough to rise for 1 to 2 hours, or until it has visibly increased in size but has not necessarily doubled. Gluten-free doughs typically don’t double in size like traditional wheat doughs, but you should see a noticeable puffiness.
4. Cold Proofing the Dough: After the initial rise, place the covered dough in the refrigerator for at least 2 to 3 hours. This “cold proofing” step is beneficial for several reasons: it slows down the yeast activity, allowing flavors to develop further, and makes the dough much easier to handle and shape without sticking.
Shape Your Bagel Dough:
5. Preheat Oven & Prepare Baking Sheet: While your dough is cold proofing, prepare for baking. Line a large baking sheet with parchment paper to prevent sticking. Preheat your oven to a high temperature of 450°F (232°C). This high heat is essential for a crisp exterior.
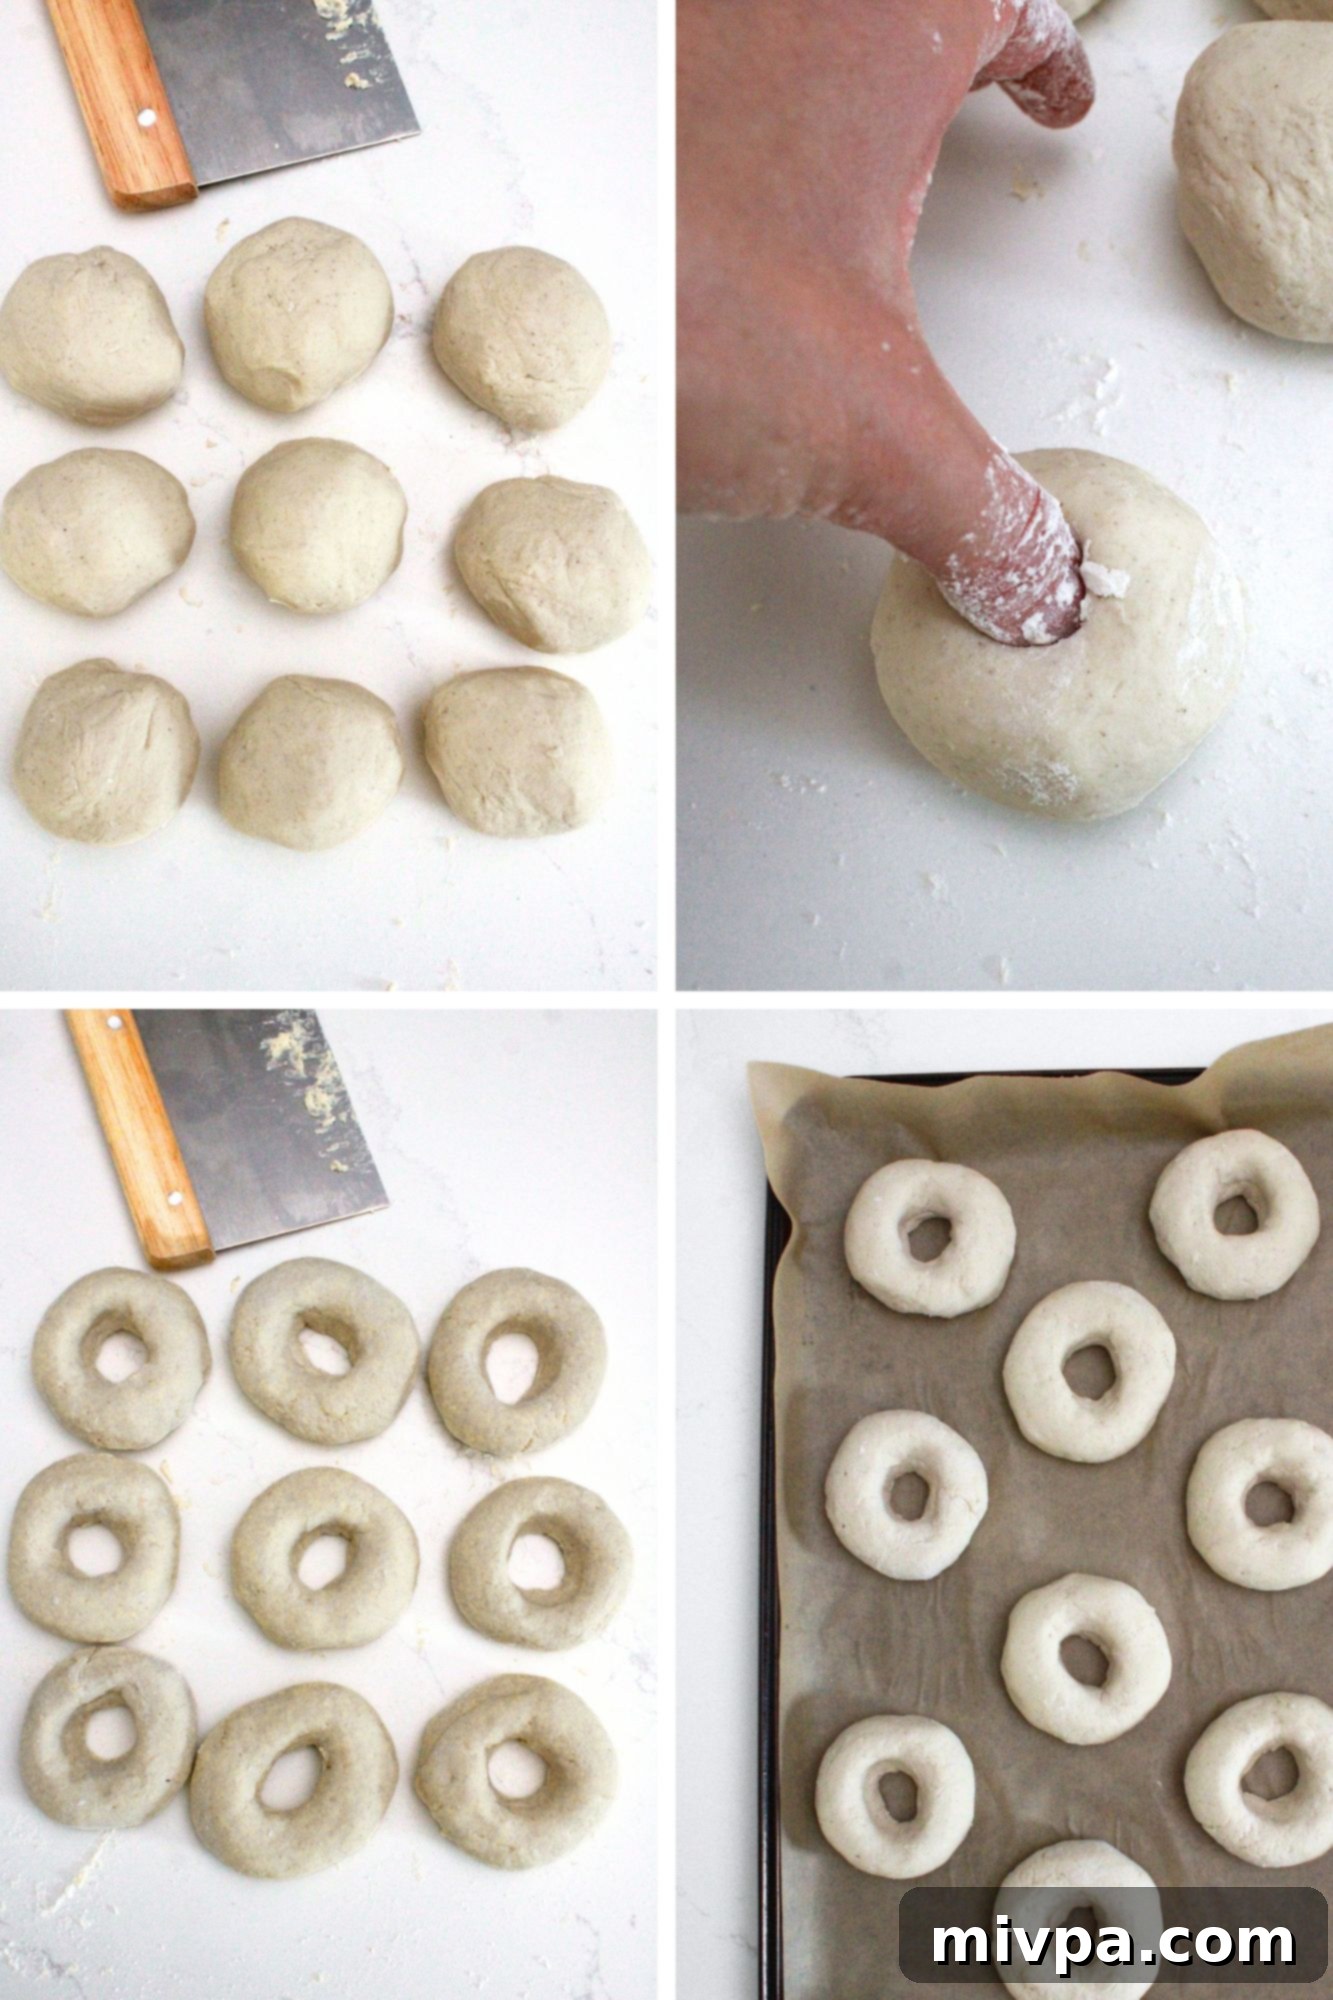
6. Knead & Divide Dough into Balls: Remove the cold-proofed dough from the refrigerator. Lightly flour your work surface and your hands. Briefly knead the dough for about a minute by hand until it feels smooth and supple. Divide the dough into 9 equal-sized portions. The cold dough will be much easier to work with. Take each portion and gently roll it into a smooth, even ball.
7. Create the Classic Bagel Shape: With floured hands, gently press your thumb directly into the center of each dough ball, creating a hole that is approximately 1.5 to 2 inches in diameter. Carefully stretch and smooth out the gluten-free bagel dough around your thumb, ensuring the hole remains open and the bagel takes on its characteristic round shape. Each shaped bagel should measure roughly 4 to 4.5 inches in diameter. Repeat this shaping process for all dough balls and arrange them on the prepared baking sheet. Cover them lightly with plastic wrap and set aside while you prepare the boiling bath.
Boil Bagels in the Baking Soda Bath:
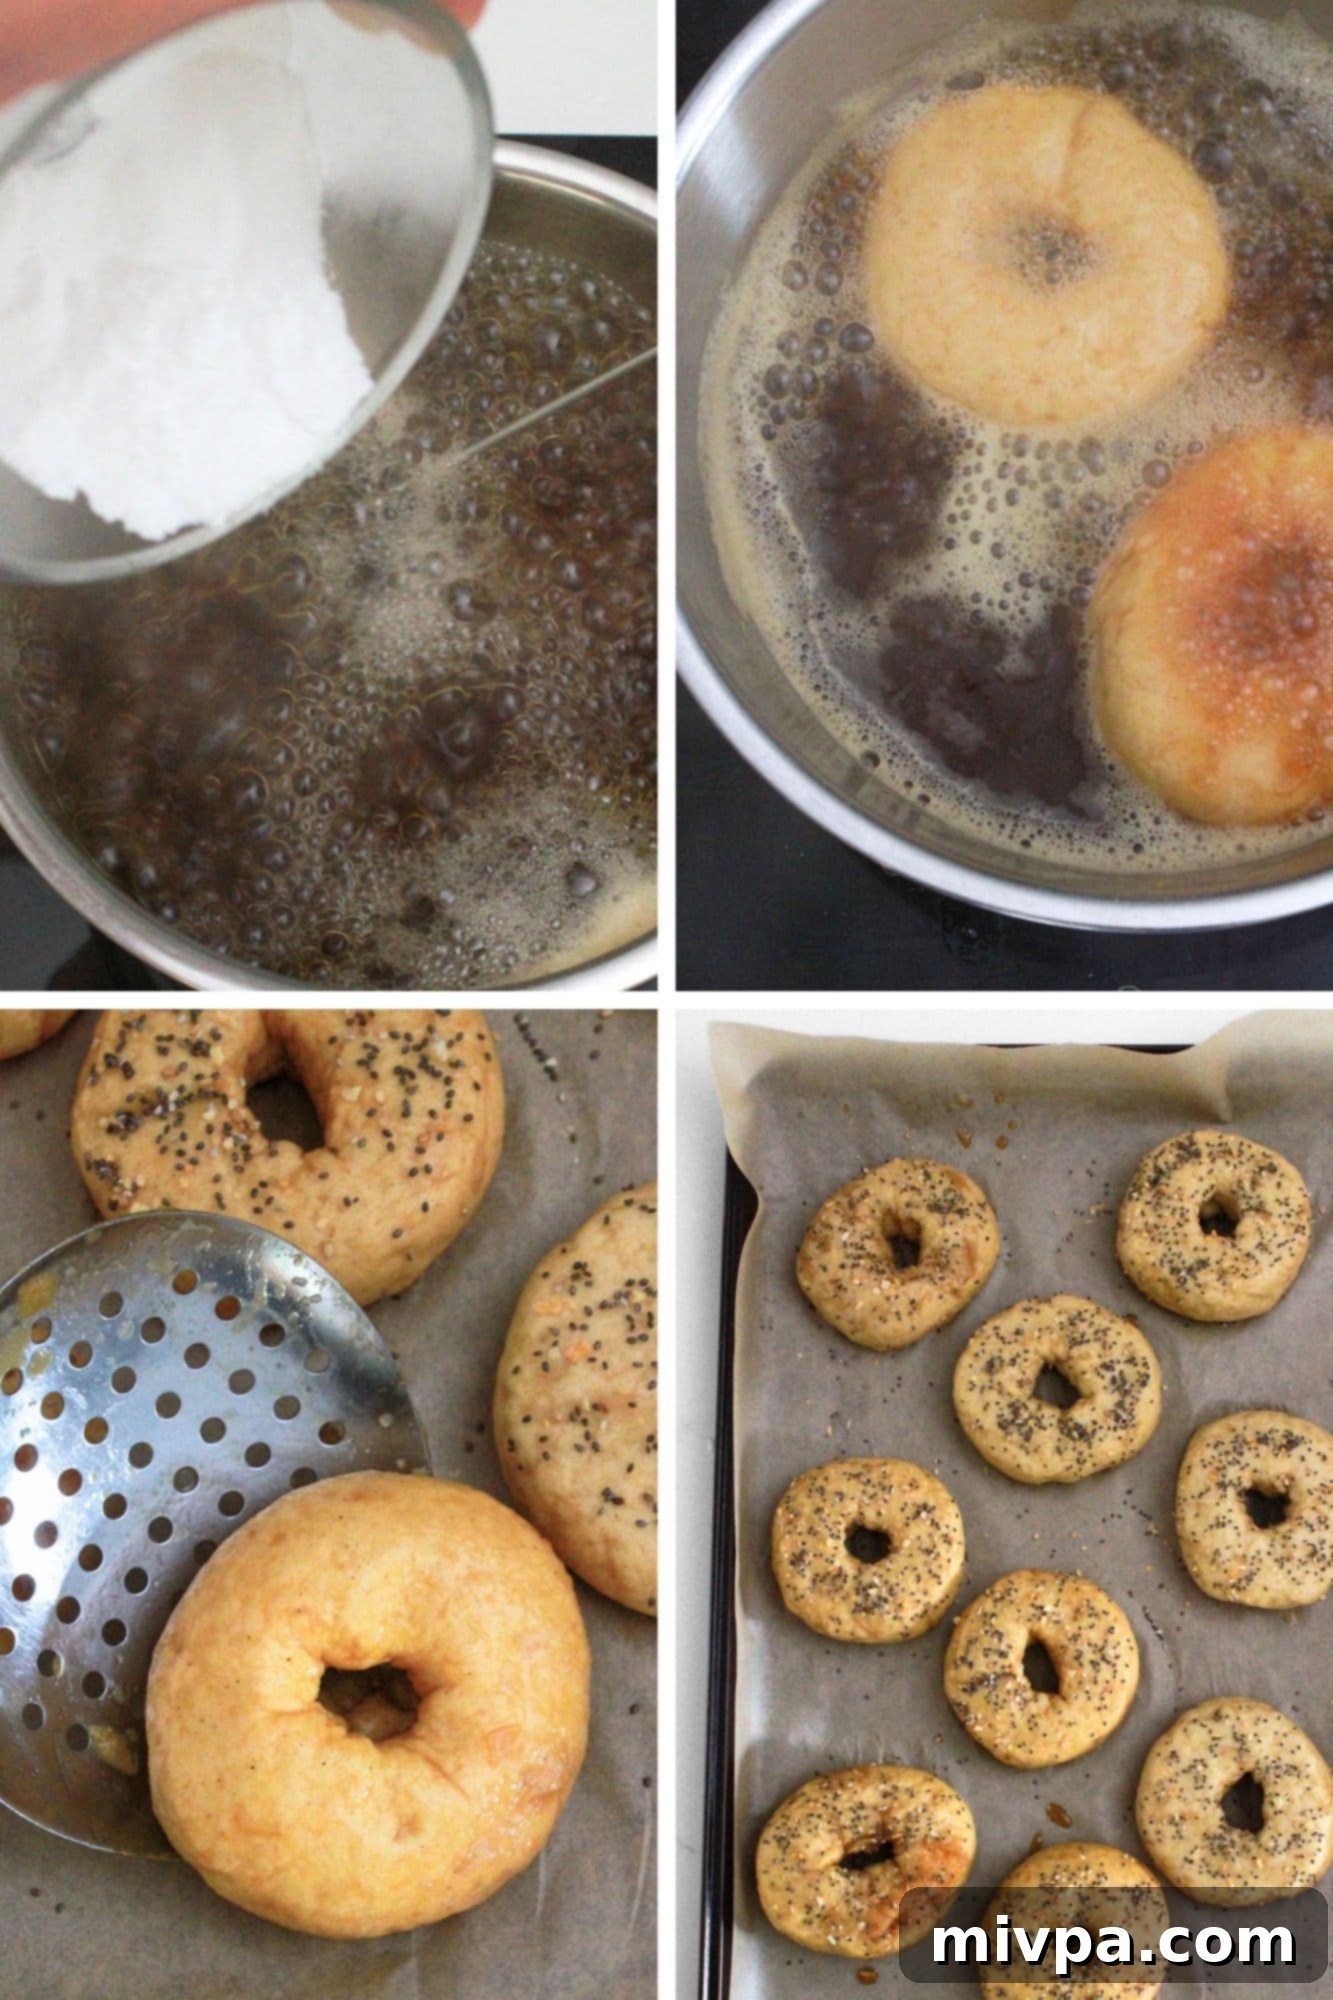
8. Prepare the Baking Soda Bath: In a medium-sized pot, bring about 3 to 4 cups of water to a rolling boil. Once boiling, stir in the molasses and baking soda. The water will become foamy; this is normal. This alkaline bath is crucial for developing the bagels’ unique crust and color.
9. Boil Bagel Dough: Using a slotted spoon or a spider strainer, carefully drop two shaped bagels into the boiling bath at a time. Avoid overcrowding the pot, as this can lower the water temperature and affect the crust. Boil each side for approximately 30 seconds. Gently flip the bagels with your slotted spoon and boil for another 30 seconds. This quick boil pre-gelatinizes the starches on the surface, contributing to that desired chewy texture and shiny crust. Remove the bagels from the water using the slotted spoon, allowing excess water to drain, and place them back on the parchment-lined baking sheet. Repeat this process until all remaining bagels have been boiled.
10. Sprinkle with Seasoning: Immediately after boiling, while the bagels are still warm and slightly tacky, generously sprinkle each bagel with your desired topping, such as the everything bagel seasoning. The moisture from the boil will help the seasoning adhere perfectly.
Bake Until Golden Perfection:
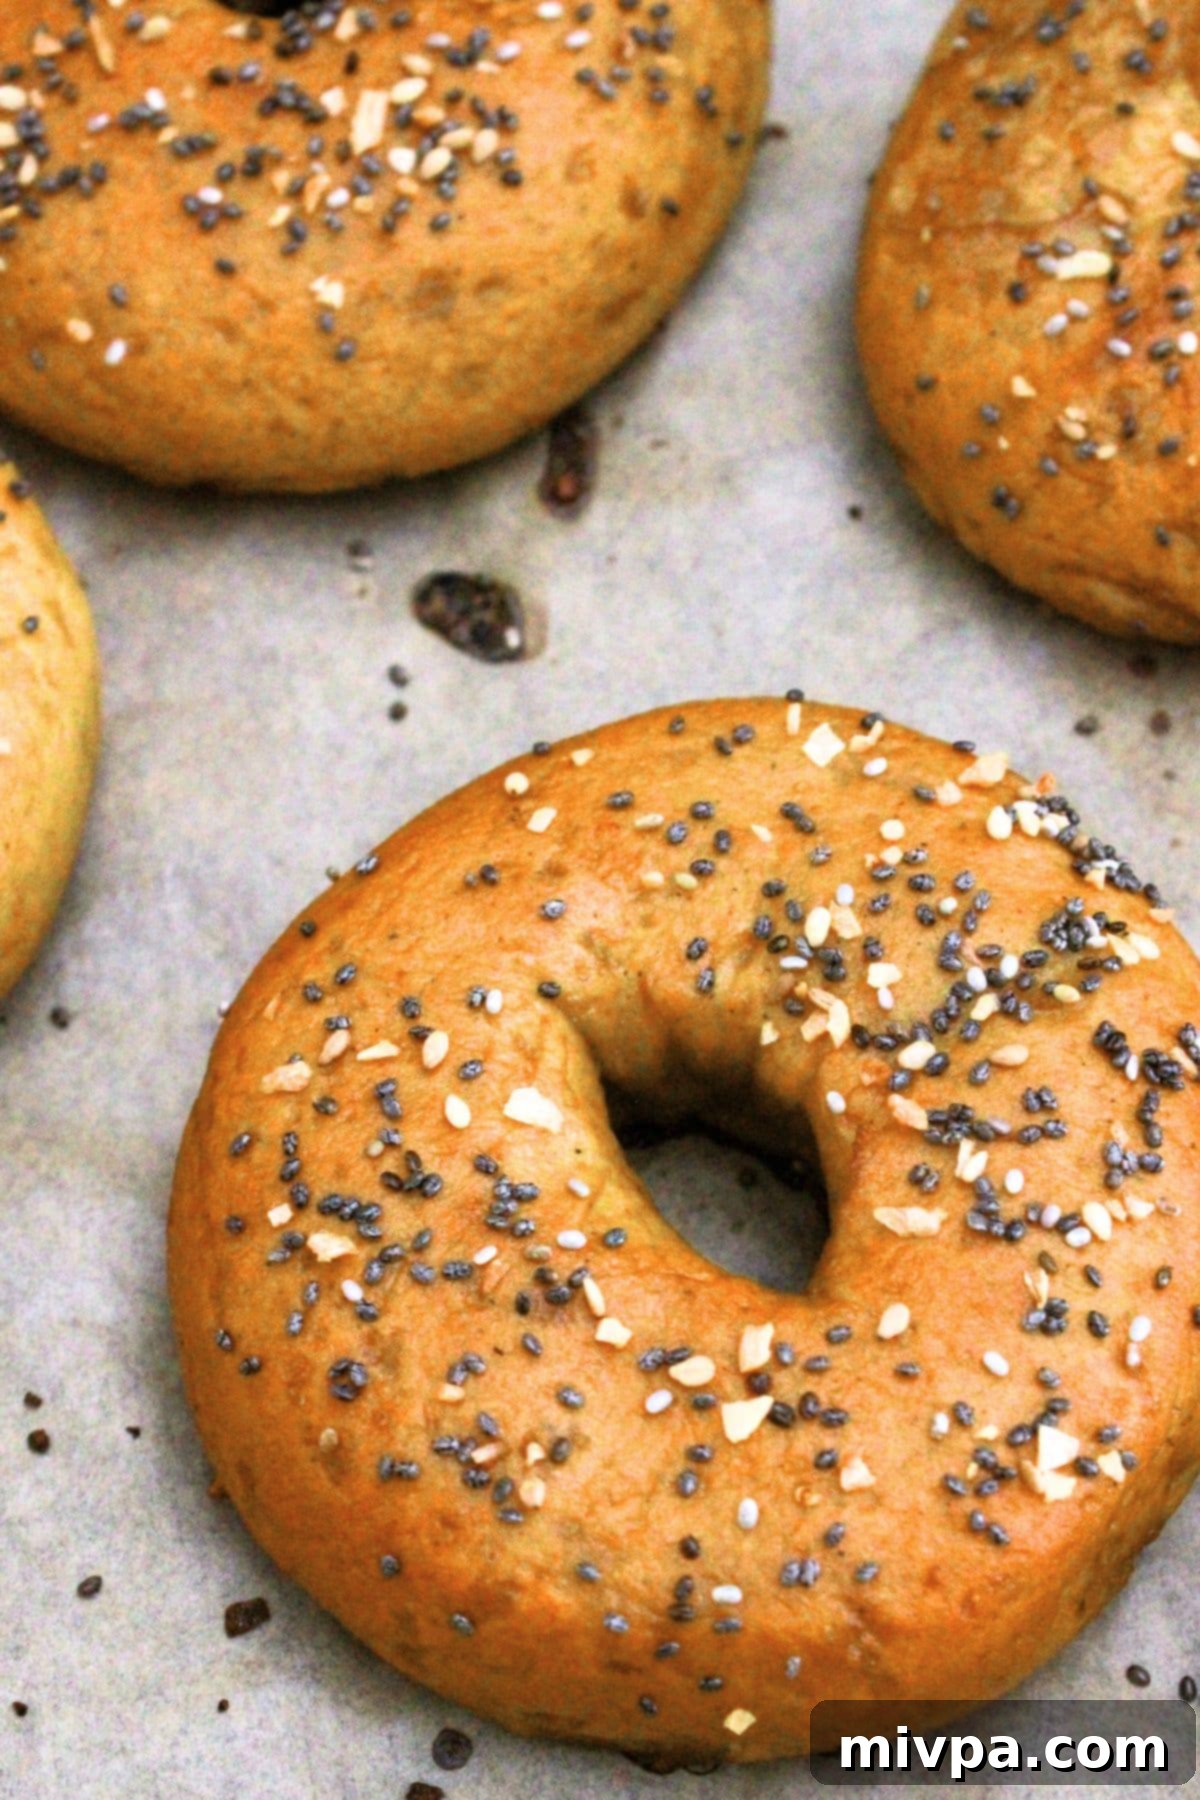
11. Bake Until Golden: Carefully transfer the baking sheet with the boiled and seasoned bagels to your preheated oven. Bake for approximately 12 to 15 minutes, or until the bagels achieve a beautiful golden-brown color and feel firm to the touch. The baking time may vary slightly depending on your oven, so keep an eye on them.
12. Cool Before Serving: Once baked, remove the gluten-free and vegan bagels from the oven and transfer them to a wire rack to cool completely. Allowing them to cool is important, as it helps the internal structure set and prevents a gummy texture. Once cool, slice them horizontally and serve with your favorite vegan cream cheese, nut butter, or any spread of your choice for a truly delightful treat!
Dish by Dish Pro Tips for Success
To ensure your gluten-free vegan bagels are always perfect and to make the most of your delicious homemade batch, here are some helpful tips:
- Storing Fresh Bagels: To keep your cooled gluten-free bagels fresh, place them in an airtight container or wrap them individually in plastic wrap. Store them in the refrigerator for up to 2 days. When you’re ready to enjoy them again, simply reheat them in a toaster or microwave for a few seconds to restore their warmth and tender texture.
- Freezing for Later: Bagels freeze wonderfully! To freeze, ensure the bagels are completely cooled, then wrap each one tightly in plastic wrap, followed by a layer of aluminum foil, or place them in a freezer-safe bag. They can be frozen for up to 2 months. To enjoy, let the bagels thaw overnight in the refrigerator, or use the defrost setting on your microwave before slicing and toasting. This is a great way to always have fresh bagels on hand!
- Customizing Your Toppings: While everything bagel seasoning is my absolute favorite for its rich flavor and delightful crunch, this recipe is incredibly versatile. Don’t hesitate to use your favorite toppings! You could opt for classic sesame seeds, poppy seeds, a mix of both, or simply leave the bagels plain for a traditional taste. For a sweeter touch, try cinnamon sugar before baking.
- Don’t Rush the Cooling: It can be tempting to slice into a warm bagel right out of the oven, but for gluten-free baking, patience is key. Allowing the bagels to cool completely on a wire rack helps the internal structure set properly, preventing a gummy texture. This step is essential for that perfect chewy bite.
- Perfect for Meal Prep: Because these bagels store and freeze so well, they are an excellent option for meal prep. Bake a double batch on the weekend and enjoy fresh, homemade bagels throughout the week or month!
Delicious Serving Suggestions for Your Homemade Bagels
Once your delectable gluten-free vegan bagels are baked and cooled, the possibilities for enjoyment are endless! Here are some fantastic ways to serve them, whether for breakfast, lunch, or a satisfying snack:
- Classic with Vegan Cream Cheese: The quintessential bagel experience! Spread a generous layer of your favorite vegan cream cheese. Add a sprinkle of fresh chives or everything bagel seasoning for an extra flavor boost.
- Savory Avocado Toast-el: Mash a ripe avocado with a squeeze of lemon juice, salt, and pepper. Spread it over a toasted bagel half. Top with red pepper flakes, everything bagel seasoning, or thinly sliced radishes for a hearty and healthy option.
- Nut Butter & Jam Delight: For a sweet and comforting treat, spread your favorite nut butter (almond, peanut, or cashew) on one half and a dollop of homemade or store-bought fruit jam on the other.
- Hummus & Veggie Bagel: Lightly toast your bagel, then spread a generous layer of hummus. Top with fresh cucumber slices, shredded carrots, spinach, and a dash of nutritional yeast for a nutritious and flavorful open-faced sandwich.
- Vegan Lox Bagel: Recreate the classic lox and cream cheese! Spread vegan cream cheese, then add thinly sliced carrots (marinated to taste like smoked salmon), capers, and fresh dill.
- Breakfast Sandwich Base: Use these sturdy bagels as the foundation for an incredible vegan breakfast sandwich. Add a vegan egg patty, plant-based bacon or sausage, and a slice of vegan cheese for a truly satisfying start to your day.
Frequently Asked Questions (FAQs)
- Why do I need to cold proof the dough? Cold proofing, or chilling the dough in the refrigerator, is a crucial step for gluten-free bagels. It slows down the yeast activity, which allows the flavors to deepen and develop more complexity. More importantly, it makes the gluten-free dough much firmer and significantly easier to handle and shape, preventing stickiness and ensuring a smoother process.
- Can I skip the baking soda bath? While you technically can skip it (as in some no-boil recipes), I strongly advise against it for this recipe if you want authentic bagels. The baking soda bath is what creates that signature shiny, golden-brown crust and contributes significantly to the chewy interior texture that bagels are known for. Without it, your bagels will be softer and more bread-like, lacking the classic bagel characteristics.
- My dough isn’t rising, what went wrong? Several factors could affect your dough’s rise. Double-check the temperature of your warm water; if it’s too cold, the yeast won’t activate, and if it’s too hot, it will kill the yeast. Ensure your yeast is fresh and not expired. Also, make sure your kitchen is warm enough during the first rise, as cold environments can hinder yeast activity.
- Can I use a different gluten-free flour? It’s important to use a good quality, balanced 1:1 gluten-free all-purpose flour blend composed of lighter starches (like rice, tapioca, corn, or potato starch). Blends containing heavier flours (such as bean flours) can result in a dense, crumbly, or gummy texture that isn’t ideal for bagels. Stick to a blend specifically designed for baking.
- How do I know when the bagels are fully baked? Your bagels are ready when they have a deep golden-brown crust, feel firm to the touch, and sound hollow when tapped on the bottom. If you have a food thermometer, the internal temperature should reach around 200-210°F (93-99°C).
Other Gluten-Free Bagel Recipes You’ll Love
- Soft, Fluffy Gluten-Free Bagels (Dairy-Free, No-Boil)
- Greek Yogurt Bagels (Gluten-Free, No-Yeast)
- Easy Gluten-Free Pumpkin Bagels (Gluten-Free, No-Boil)
More Gluten-Free Bread Recipes to Bake
- Gluten-Free Chocolate Chip Pumpkin Bread (Dairy-Free)
- Easy Gluten-Free Drop Biscuits (Dairy-Free)
- Gluten-Free Vegan Bagels (Chewy and Tender!)
- Egg-Free Gluten-Free Bread (So Tender!)
P.S. If you try this recipe, I’d love for you to leave a star rating below, and/or a review in the comment section further down the page. I always appreciate your feedback. Be sure to check out my entire Recipe Index for all the recipes on the blog. You can also follow me on Pinterest, Facebook or Instagram! Sign up for my Email List to get fresh recipes in your inbox each week!
Print
Gluten-Free Vegan Bagels (Chewy and Tender!)
5 Stars
4 Stars
3 Stars
2 Stars
1 Star
No reviews
Author: Felicia Lim
Total Time: 3 hours 25 minutes
Yield: 9 bagels
Diet: Gluten Free, Vegan
Description
These homemade gluten-free vegan bagels offer a truly delicious experience, featuring a perfectly chewy interior and a beautiful, shiny golden-brown exterior. Flavored with savory everything bagel seasoning, they are free from eggs, dairy, and gluten, making them a fantastic treat for everyone. Bake a batch today and enjoy the taste of an authentic bagel without any dietary compromises!
Ingredients
Units
Scale
For the Gluten-Free Bagel Dough:
- 3 cups gluten free 1:1 baking flour blend
- 1 1/2 teaspoons xanthan gum, in addition to what may be in your blend
- 2 tablespoons light brown sugar
- 1 teaspoon salt
- 2 1/4 teaspoons instant dry yeast
- 1 1/4 cup warm water (between 105F to 115F)
- 2 tablespoons dairy-free butter (vegan butter), melted
For the Baking Soda Bath:
- 4 cups water
- 2 tablespoons baking soda
- 1 tablespoon molasses (ensure it’s vegan if applicable)
For the Topping:
- 2 tablespoons everything bagel seasoning, or preferred topping
Instructions
- Whisk Dry Ingredients: In the bowl of a stand mixer, add the gluten-free flour blend, xanthan gum, salt, instant yeast, and brown sugar. Whisk thoroughly to combine all dry ingredients evenly.
- Add Melted Butter & Knead: Pour in the melted dairy-free butter. Mix using the dough hook attachment on low speed until the butter is fully mixed in. Increase speed to medium and knead the dough for 5 minutes until smooth.
- Let Dough Rise: Cover the bowl with plastic wrap and set it aside in a warm area for 1 to 2 hours, or until the dough has noticeably risen but not necessarily doubled in size (gluten-free dough typically doesn’t double).
- Cold Proof Dough: Place the covered dough in the refrigerator for at least 2 to 3 hours. This cold proofing step enhances flavor and makes the dough much easier to handle.
- Preheat Oven & Line Baking Sheet: After cold proofing, line a baking sheet with parchment paper. Preheat your oven to 450°F (232°C).
- Knead & Shape Dough into Balls: Transfer the dough to a lightly floured surface. Knead it gently by hand for about a minute until smooth. Divide the dough into 9 equal-sized portions and shape each portion into a smooth ball.
- Create Bagel Shape: With floured hands, press your thumb into the center of each dough ball to create a hole about 1.5 to 2 inches wide. Gently stretch and smooth the dough around your thumb to form the classic bagel shape (each bagel should be about 4-4.5 inches in diameter). Place the shaped bagels on the prepared baking sheet and cover with plastic wrap.
- Prepare Baking Soda Bath: Bring 3 to 4 cups of water to a boil in a medium-sized pot. Stir in the molasses and baking soda.
- Boil Bagel Dough: Using a slotted spoon, carefully place two shaped bagels into the boiling bath at a time. Boil for approximately 30 seconds, then flip and boil for another 30 seconds. Remove the bagels from the water, allowing excess water to drain, and place them back on the parchment paper. Repeat until all bagels have been boiled.
- Sprinkle Boiled Dough with Seasoning: Immediately after boiling, generously sprinkle each bagel with everything bagel seasoning or your chosen topping.
- Bake Until Golden: Place the baking sheet in the preheated oven and bake for 12 to 15 minutes, or until the bagels are beautifully golden brown and firm.
- Cool Before Serving: Transfer the baked gluten-free and vegan bagels to a wire rack to cool completely before slicing and serving with vegan cream cheese or your favorite spread.
Notes
Gluten-Free Flour Blend: For best results, use a high-quality gluten-free 1:1 flour blend made primarily from lighter flours/starches (e.g., rice, tapioca, corn, potato starch) to ensure a tender, fluffy texture. Avoid blends with heavy flours like garbanzo bean, which can lead to dense bagels.
Xanthan Gum: This is vital for binding and elasticity in gluten-free dough. Add the specified xanthan gum even if your blend contains some, for optimal chewiness. Psyllium husk powder can be substituted in equal amounts if allergic.
Sugar: Light brown sugar, white sugar, or cane sugar all work. Its main purpose is to feed the yeast, enabling the dough to rise properly.
Instant Yeast: I prefer instant dry yeast as it doesn’t require pre-activation and can be mixed directly with dry ingredients.
Warm Water: The water must be between 105°F to 115°F (40°C to 46°C). Too cold, yeast won’t activate; too hot, yeast will die. Use a thermometer for accuracy.
Butter: To keep this recipe vegan, use dairy-free butter. Regular butter can be used if you’re not dairy-free or vegan.
Baking Soda: Baking soda in the bath is essential for the characteristic shiny, golden-brown, chewy exterior of bagels.
Molasses: Use vegan molasses for depth of color and flavor in the boiling bath.
Everything Bagel Seasoning: While everything bagel seasoning is recommended, feel free to use any preferred topping or leave plain.
Storing: Store cooled bagels in an airtight container or wrapped in plastic wrap in the fridge for up to 2 days. Reheat in a toaster or microwave. Freezing: Wrap bagels tightly and freeze for up to 2 months. Thaw overnight in the fridge or defrost in the microwave before slicing and eating.
- Prep Time: 10 mins
- Rise Time: 3 hours
- Cook Time: 15 mins
- Category: Bread
- Method: Baking
- Cuisine: Western
